User Guide
Comprehensive user guide for getting started with MD.ai Reporting
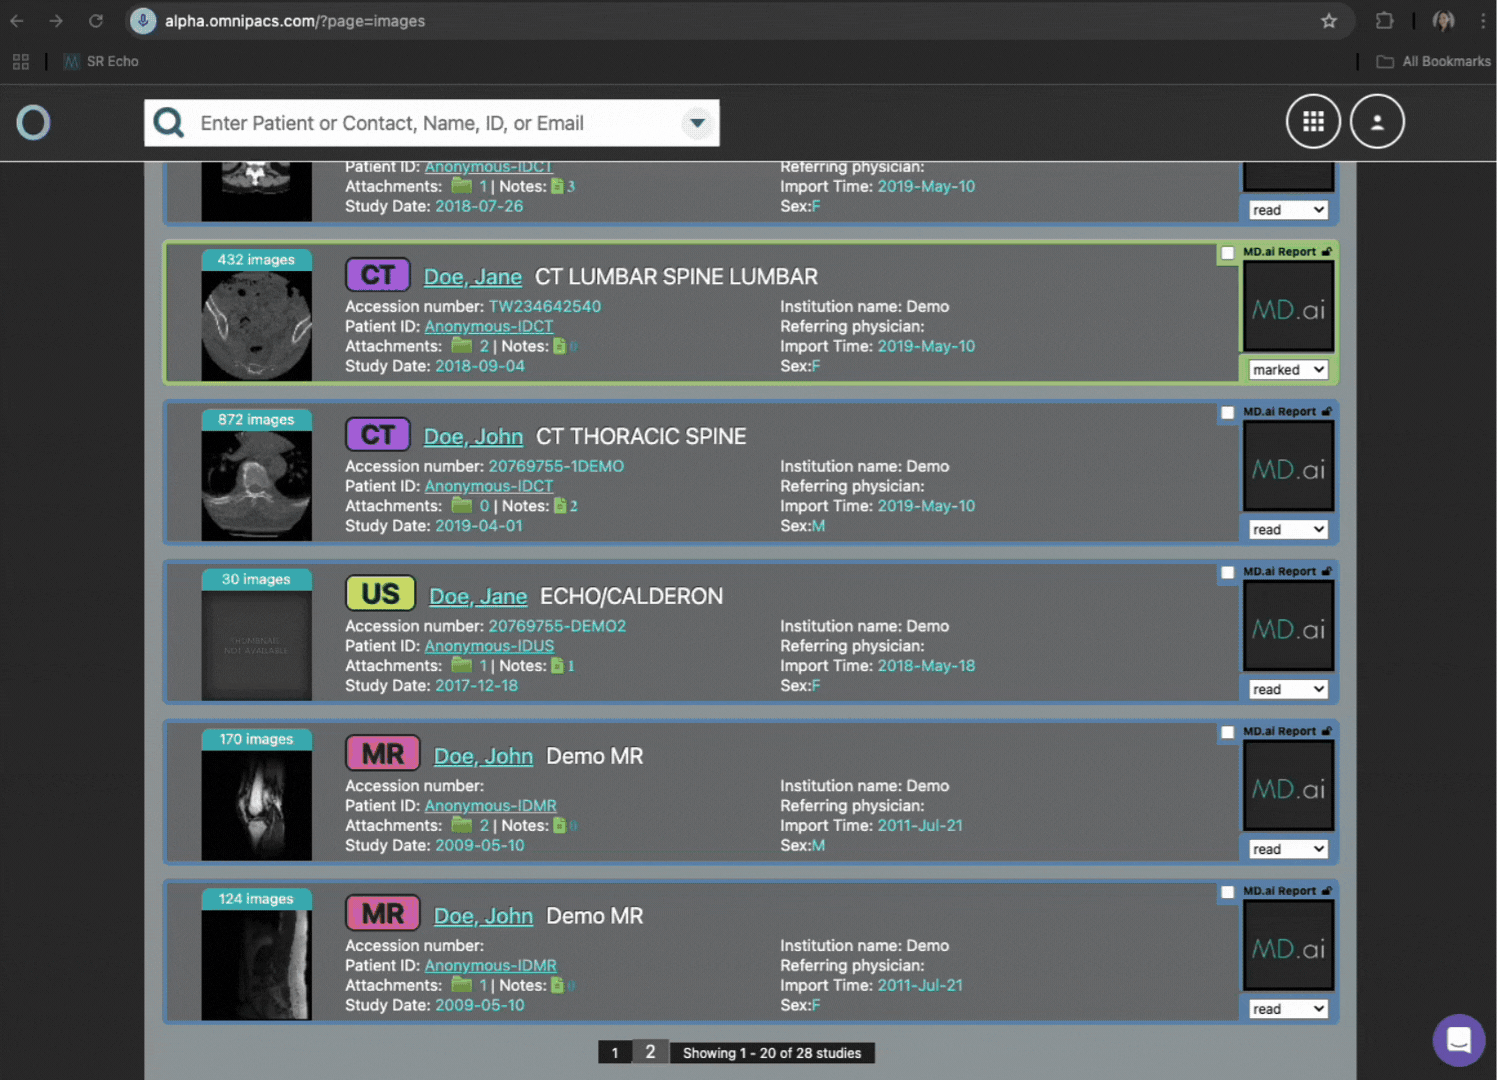
Launch reporting
Once integrated, you will launch reporting from your RIS/PACS.
Learn about user roles
Site admin
Site admins can access the site admin settings to manage site and location configurations, including but not limited to:
- viewing all reports
- updating system templates and site clinical guidelines
- setting the final report format
- managing site users
- creating prelim workflows
- viewing site HL7 messages
- checking site usage dashboard
User
Regular users do not have access to the site admin settings and can:
- draft or sign reports
- take over others' reports if they have access to the same studies from the worklist
- view finalized reports signed by others if the same access is granted
Prelim user / prelim reviewer
Both site admins and regular users can be assigned as prelim reviewers or prelim users. Learn more about prelim workflows and user roles here.
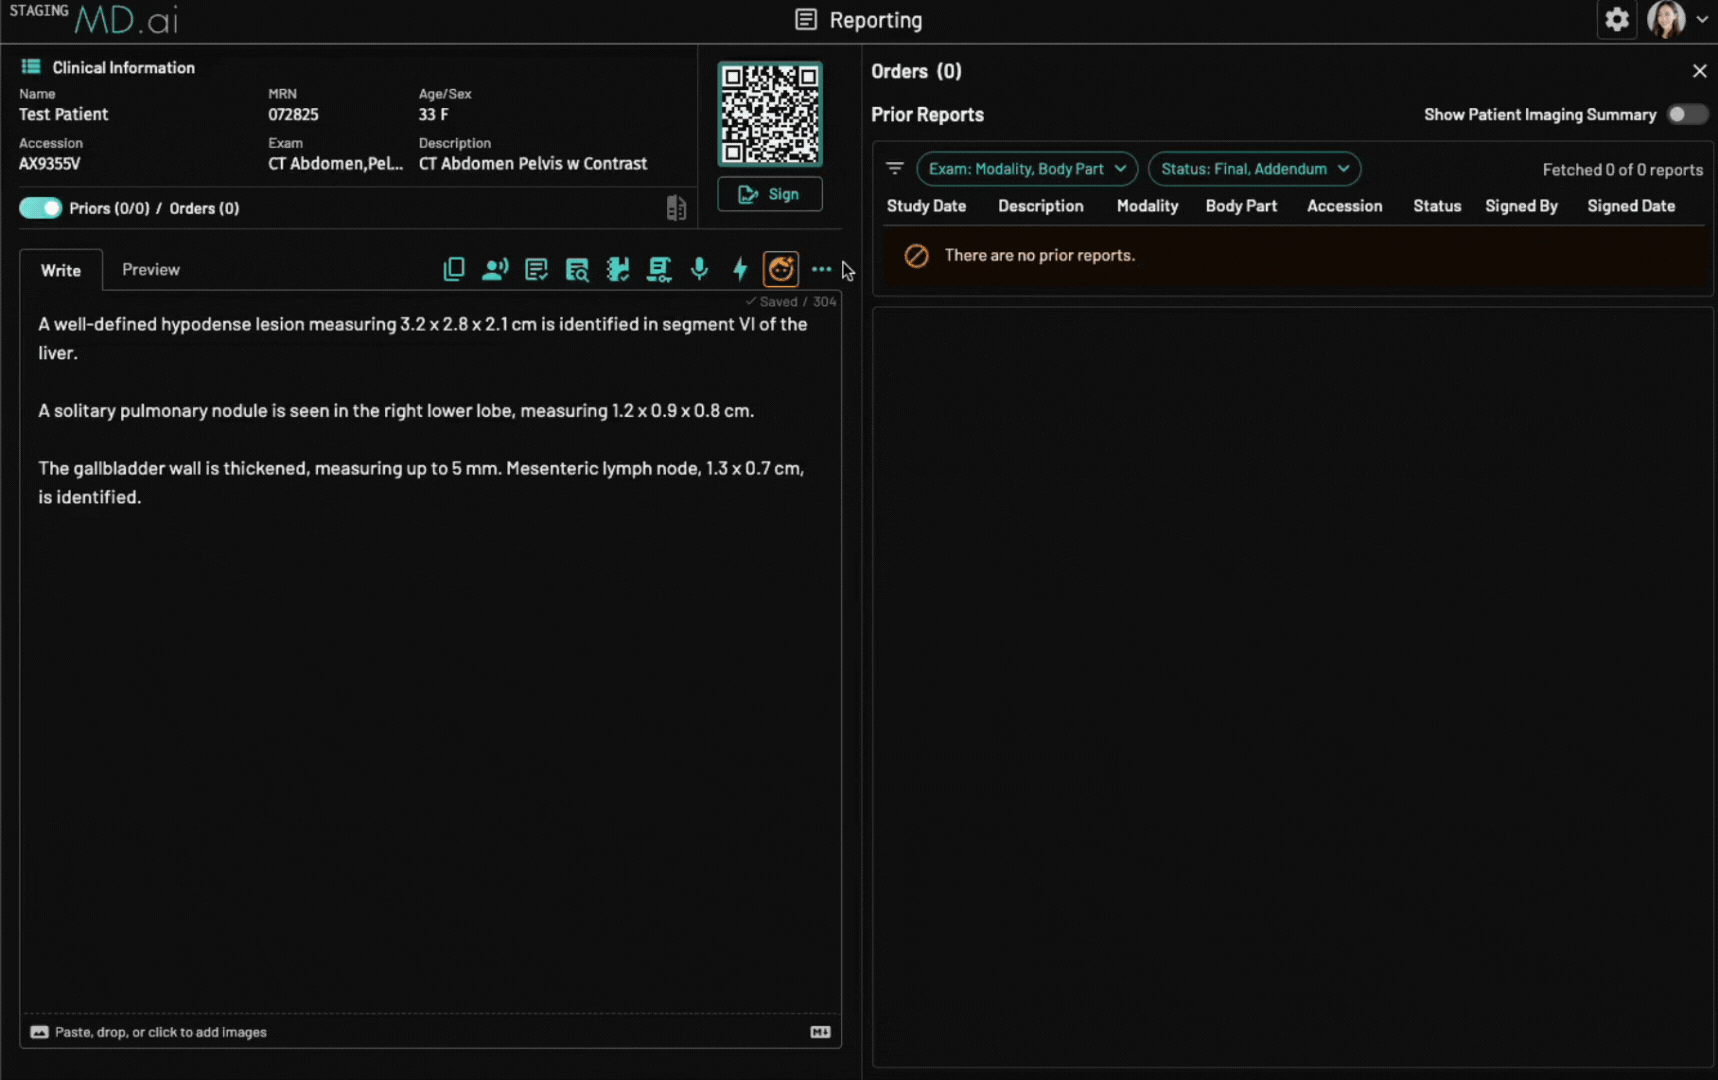
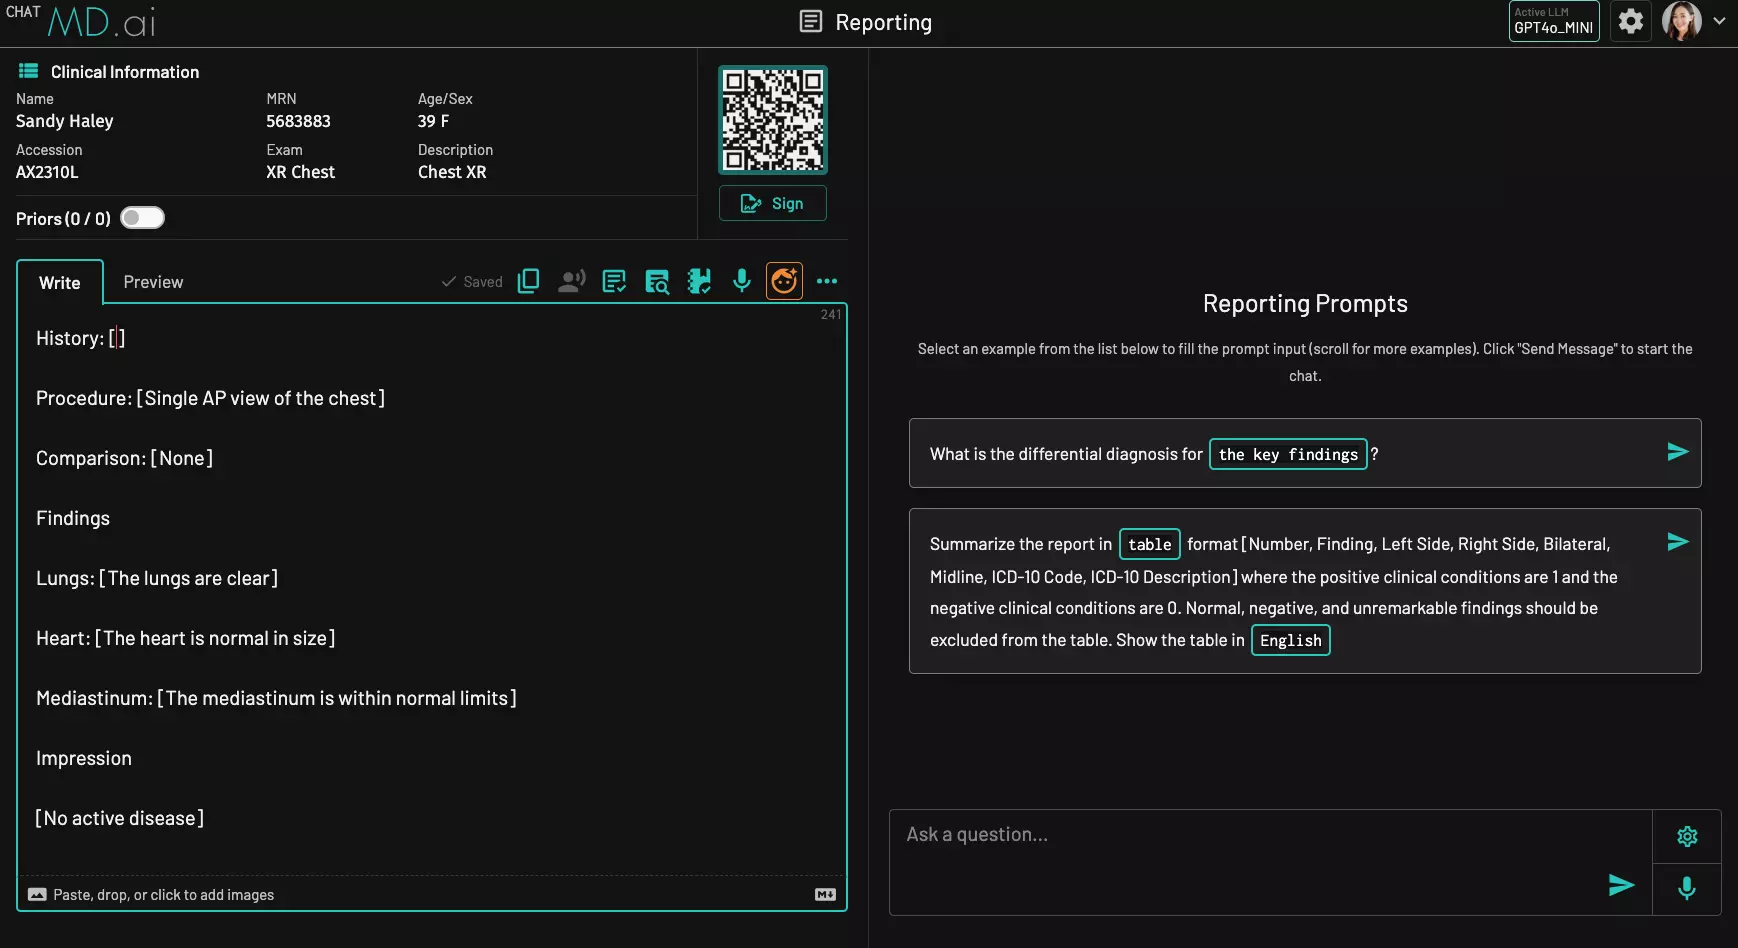
AI key findings mode
Use the AI key findings mode to accelerate your reporting.
Dictate a set of key findings.
Click ![]() or press
or press Ctrl + G to let AI auto-select the best template, map the key findings to the template, compare with the selected prior report(s), and generate an impression.
You can also manually apply a template by using the voice command "Apply Template 1" (or any template number you want), or by clicking the "Apply Key Findings" button next to a template in the user interface.

Review the draft structured report with highlighted key findings and choose to keep/undo.

Auto-compare prior findings
Automatic comparison of prior findings across existing prior reports is an optional feature. You can enable or disable it using the toggle switch:
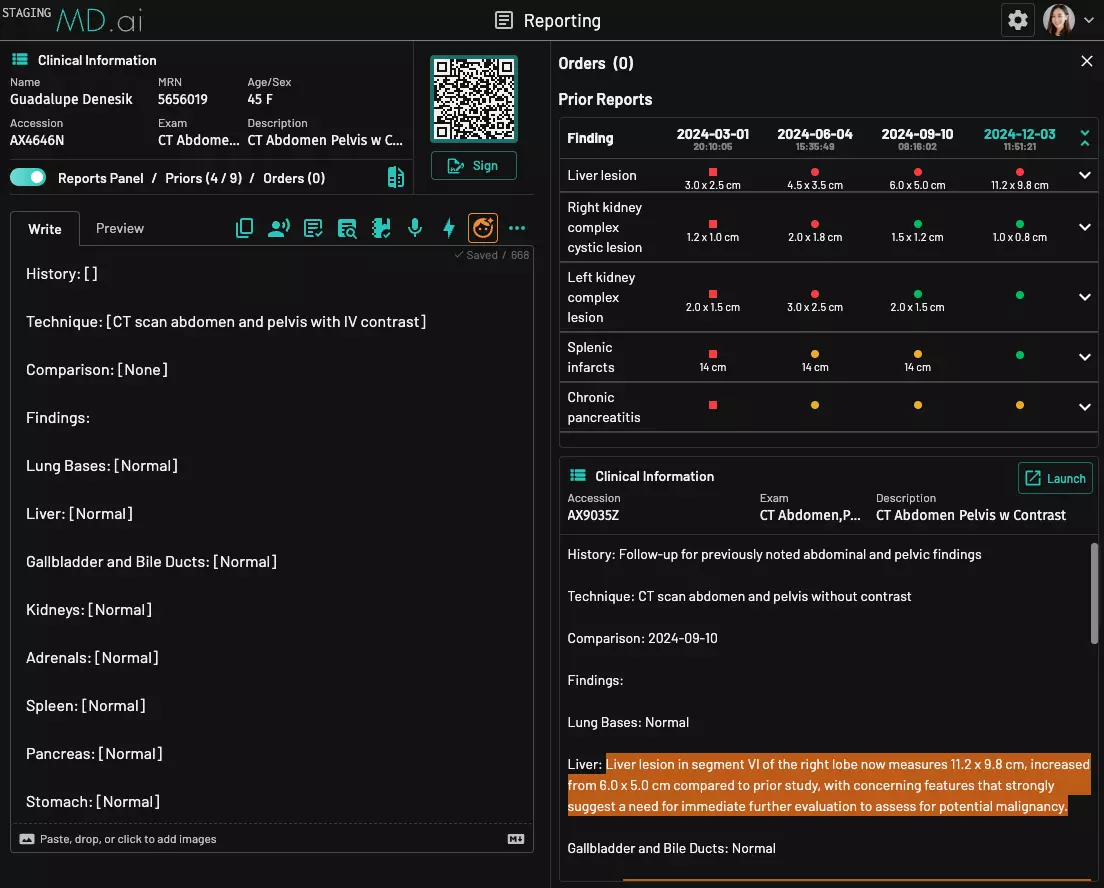
Prior finding trends
Track the progression of lesions or diseases over time. This feature allows you to monitor trends of key findings during the reporting process and automatically includes this information in your final report.
Basic reporting mode
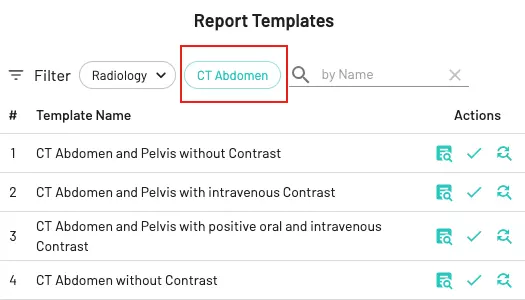
Templates
Start with a template: You can select a template manually from the list, use a voice command to apply one, or simply click the AI button to automatically insert the most appropriate template based on the current study information.

Filtering your templates list
Toggle the clinical info filter on or off to view either all available templates or only those specifically suggested for your current active report.
Template types
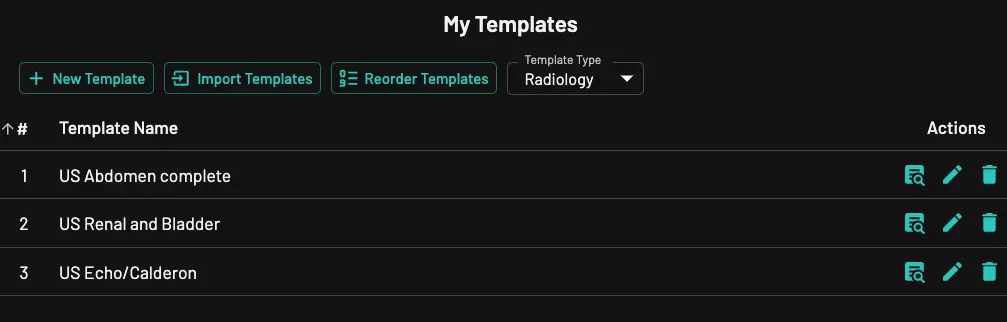
- My Templates: Personal templates that you can create and edit
- System Templates: Templates available to all users that can only be modified by site administrators
Your templates will always be displayed first:
Navigation
Navigate through the fields in a template using keyboard shortcuts:
-
Forward:
Tab -
Backward:
Shift + Tab
Dictation
To start dictation within any bracketed field, click or (short) press Ctrl + S. Click or (short) press Ctrl + S again to stop recording.
Auto-generate impression
To auto-generate an impression based on the report body, click on the AI button ![]() . AI Impression generation is triggered by key words: “Impression” or “Conclusion” in a report.
. AI Impression generation is triggered by key words: “Impression” or “Conclusion” in a report.
DICOM SR / AI results
MD.ai Reporting can receive measurements from DICOM SR files or AI outputs directly, pre-populate these measurements in a report, and map them to a template. Contact your PACS or RIS provider to get this feature configured properly.
OCR extraction
OCR extraction automatically converts measurement values from ultrasound, DEXA, and other secondary-capture images into text for AI-assisted reporting.
Radiologists often still transcribe these measurements manually, but simply taking a screenshot and uploading it to MD.ai Reporting streamlines the process and saves time. Unlike DICOM SR ingestion, which MD.ai also supports, not all imaging modalities generate structured reports, so this tool provides an easy, universal alternative.
Upload a screenshot by copying and pasting it, dragging and dropping it, or taking a photo with your phone if you're connected via QR code.
Screenshot shortcuts
Mac:
- Entire screen to clipboard:
⌘ + Ctrl + Shift + 3 - Selection to clipboard:
⌘ + Ctrl + Shift + 4 - Paste:
⌘ + V
Windows:
- Capture a selected area:
Windows Key + Shift + S(opens Snipping Tool; select area; automatically copied to clipboard) - Paste:
Ctrl + V
Map OCR results to template
If you want the extracted measurements to populate your reporting template automatically, enable "Map to Template":
Automatic volume calculations of 3D measurements
Volumes of 3D measurements can be automatically calculated and inserted.
Key images
To attach key images, simply drag and drop them into the report. There is a current limit of 1 GB per report.

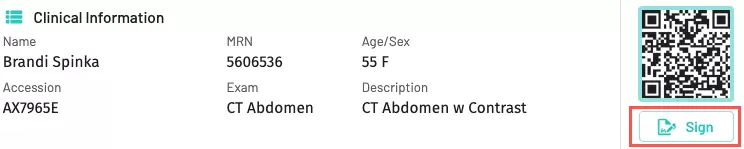
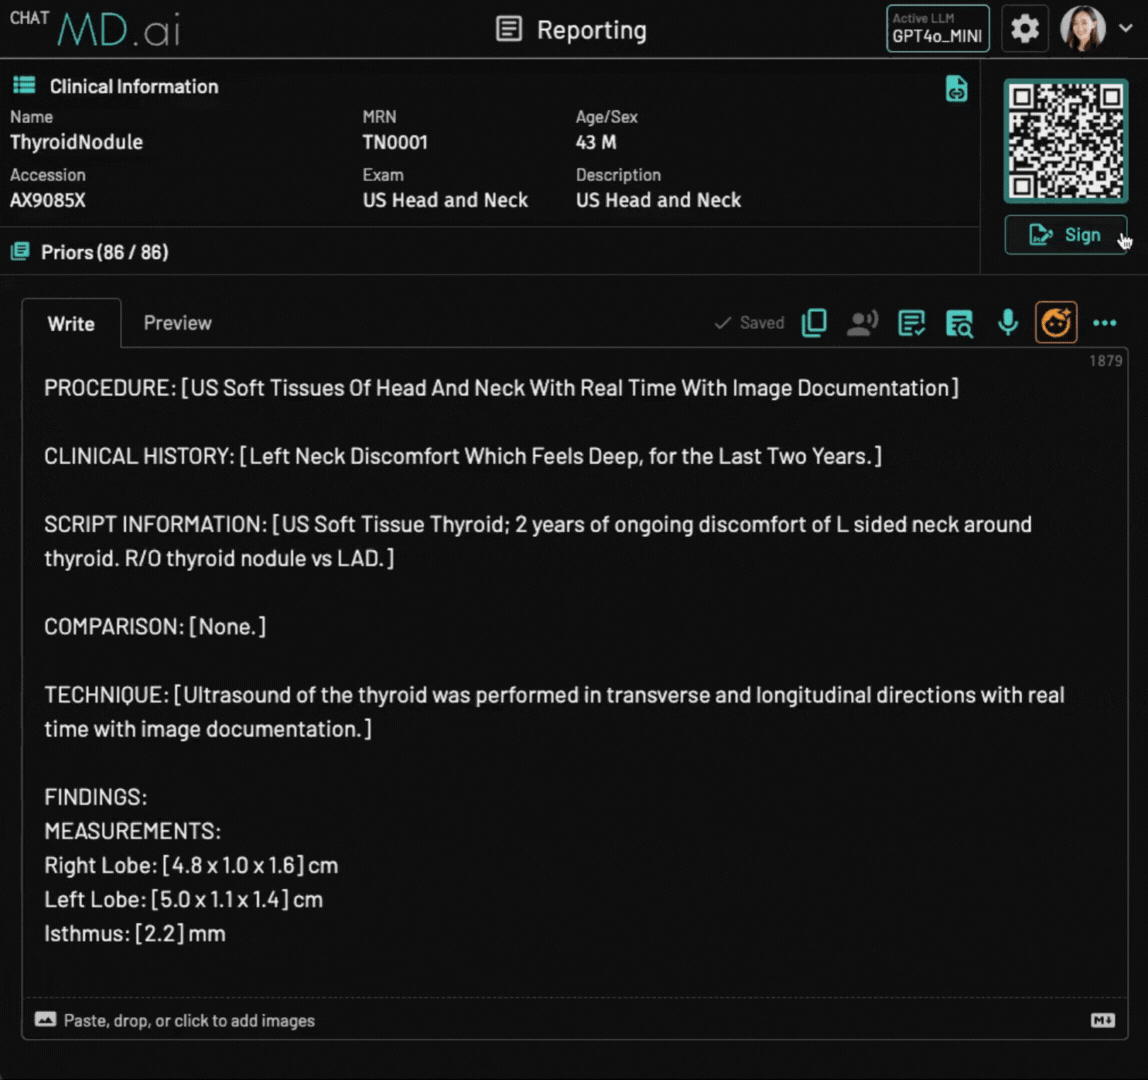
Finalize report
Click the "Sign" button to finalize the report. There will be a period of time available to revert the report back to draft status.
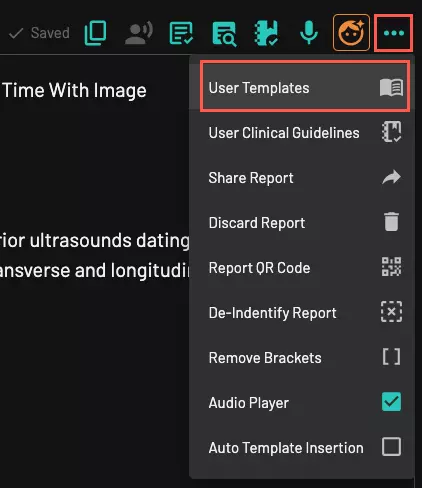
Manage templates
User templates
System templates
System templates are configured by site admins at the site level.
Templates can be imported using the following file formats:
.txt.xml(e.g., PowerScribe or Dragon format).csv(MD.ai format)
To create your own CSV file for import, please follow the MD.ai CSV structure. Your CSV must include these columns:
Name, Content, Type, Modality, Body Part, Prompt, Voice Shortcut, Clinical GuidelinesName, Content, Type, Modality, and Body Part are required columns. You may leave the other columns blank if they are not applicable. To help you get started, use this example CSV file as a template.
Picklists in templates
Picklists can be added to templates using the following syntax: [[A | B | C]]. To set a default option, wrap it in curly braces: [[A | {B} | C]]. In the report editor, the picklist will appear as a dropdown menu.

Video: Create a template
Video: Import and bulk delete templates
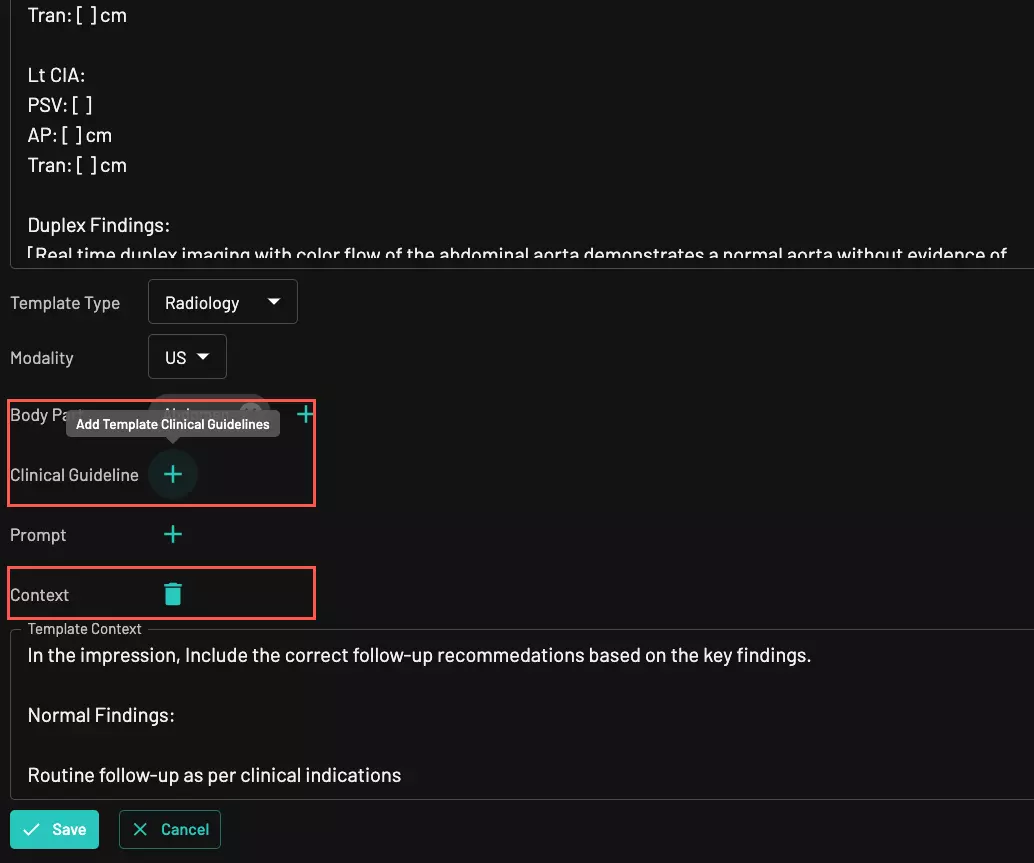
Clinical guidelines
- Method 1: View and select any available site guidelines you would like to apply to a report:

- Method 2: If a clinical guideline is attached to a particular template, when you apply the template, the corresponding guideline will automatically be included in the report.
Manage clinical guidelines
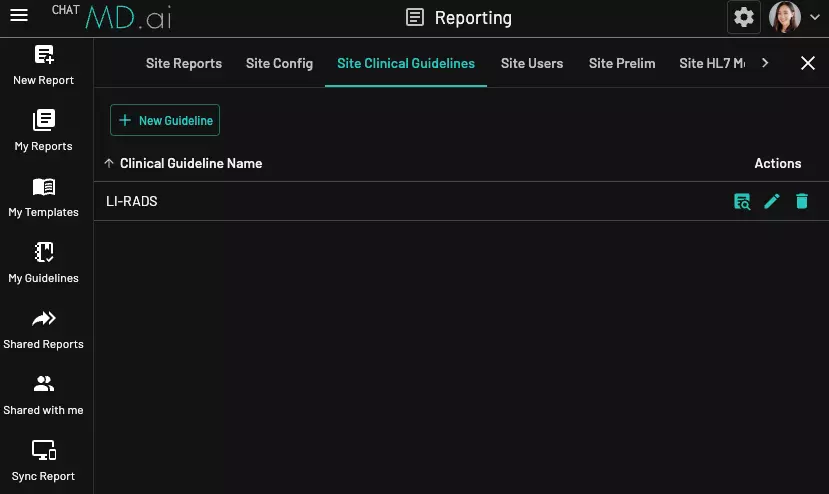
Site clinical guidelines
These are configured by site admins only and are available for all users on the same site/location.
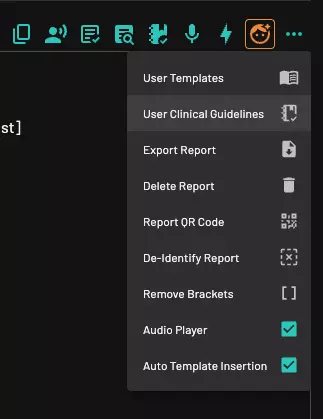
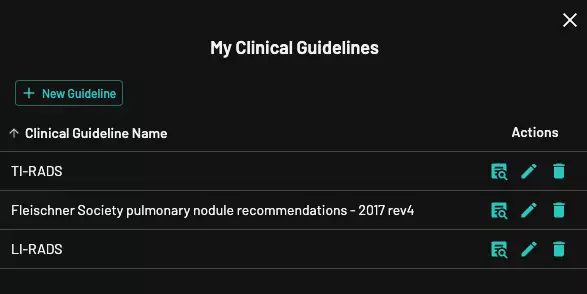
User clinical guidelines
These are configured by individual users and can be customized according to personal preferences.
Associating clinical guidelines to a template
Clinical guidelines can be associated with a template. See also the section on how to add user templates.
Customize report sign workflow
The report sign workflow can be customized in User Settings, which can be accessed by clicking the button next to your profile picture in the top right corner.
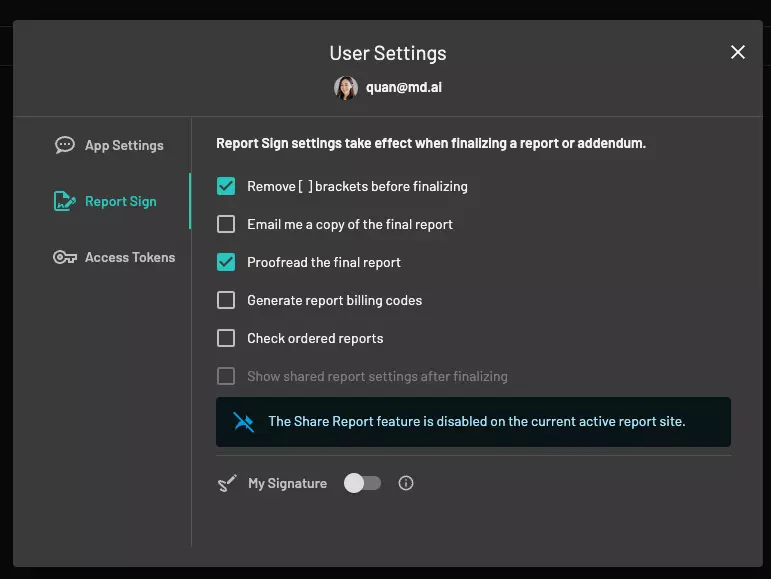
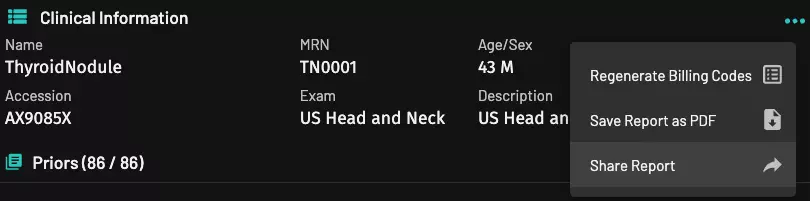
Billing codes generation
upon signing a report, ICD and CPT codes are automatically generated and saved under the final report. This can be turned off in user settings.
Addendum
After a report is finalized, it will no longer be editable. However, in the final report viewer, a button will appear that allows you to add an addendum.

Voice commands and keyboard shortcuts
| Voice commands | Function | Keyboard shortcuts / UI buttons |
|---|---|---|
| Select template [template name or user-defined voice shortcut] ex: 'Select template AP Chest' | To insert a template | Click |
| Next Field / Previous Field | To go to the next or previous field: [ ] | TabShift + Tab |
| Macro number # ex: 'Macro number 1' or Select macro [macro name] ex: 'Select macro Facet' | To insert a macro | To manually select a macro, click the list |
| Apply number # ex: 'Apply number 1' or Apply template [template name or user-defined voice shortcut] ex: 'Apply template AP Chest' | To apply key findings to a selected template | Click |
| Undo | Undo | ⌘/Ctrl + Z |
| Redo | Redo | ⌘/Ctrl + Y |
| Cut It | Cut the selected text | ⌘/Ctrl + X |
| Copy It | Copy the selected text | ⌘/Ctrl + C |
| Paste It | Paste | ⌘/Ctrl + V |
| Select All | Select all the text | ⌘/Ctrl + A |
| Capitalize It | Capitalize the selected text | |
| Bold It | Bold the selected text | |
| Underline It | Underline selected text | |
| Abracadabra / Generate | Run the AI button | Ctrl + GCtrl + Shift + Left |
| Sign Report | Sign the report | Alt (⌥) + F |
Note that there are also certain words or phrases, when spoken during dictation, that will insert punctuation or formatting. This is a non-exhaustive list:
| Speech | Transcription |
|---|---|
| comma | , |
| period | . |
| colon | : |
| new line | New line |
| new paragraph / paragraph | New paragraph |
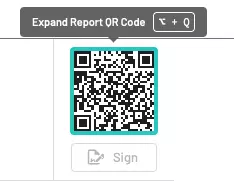
Real-time sync
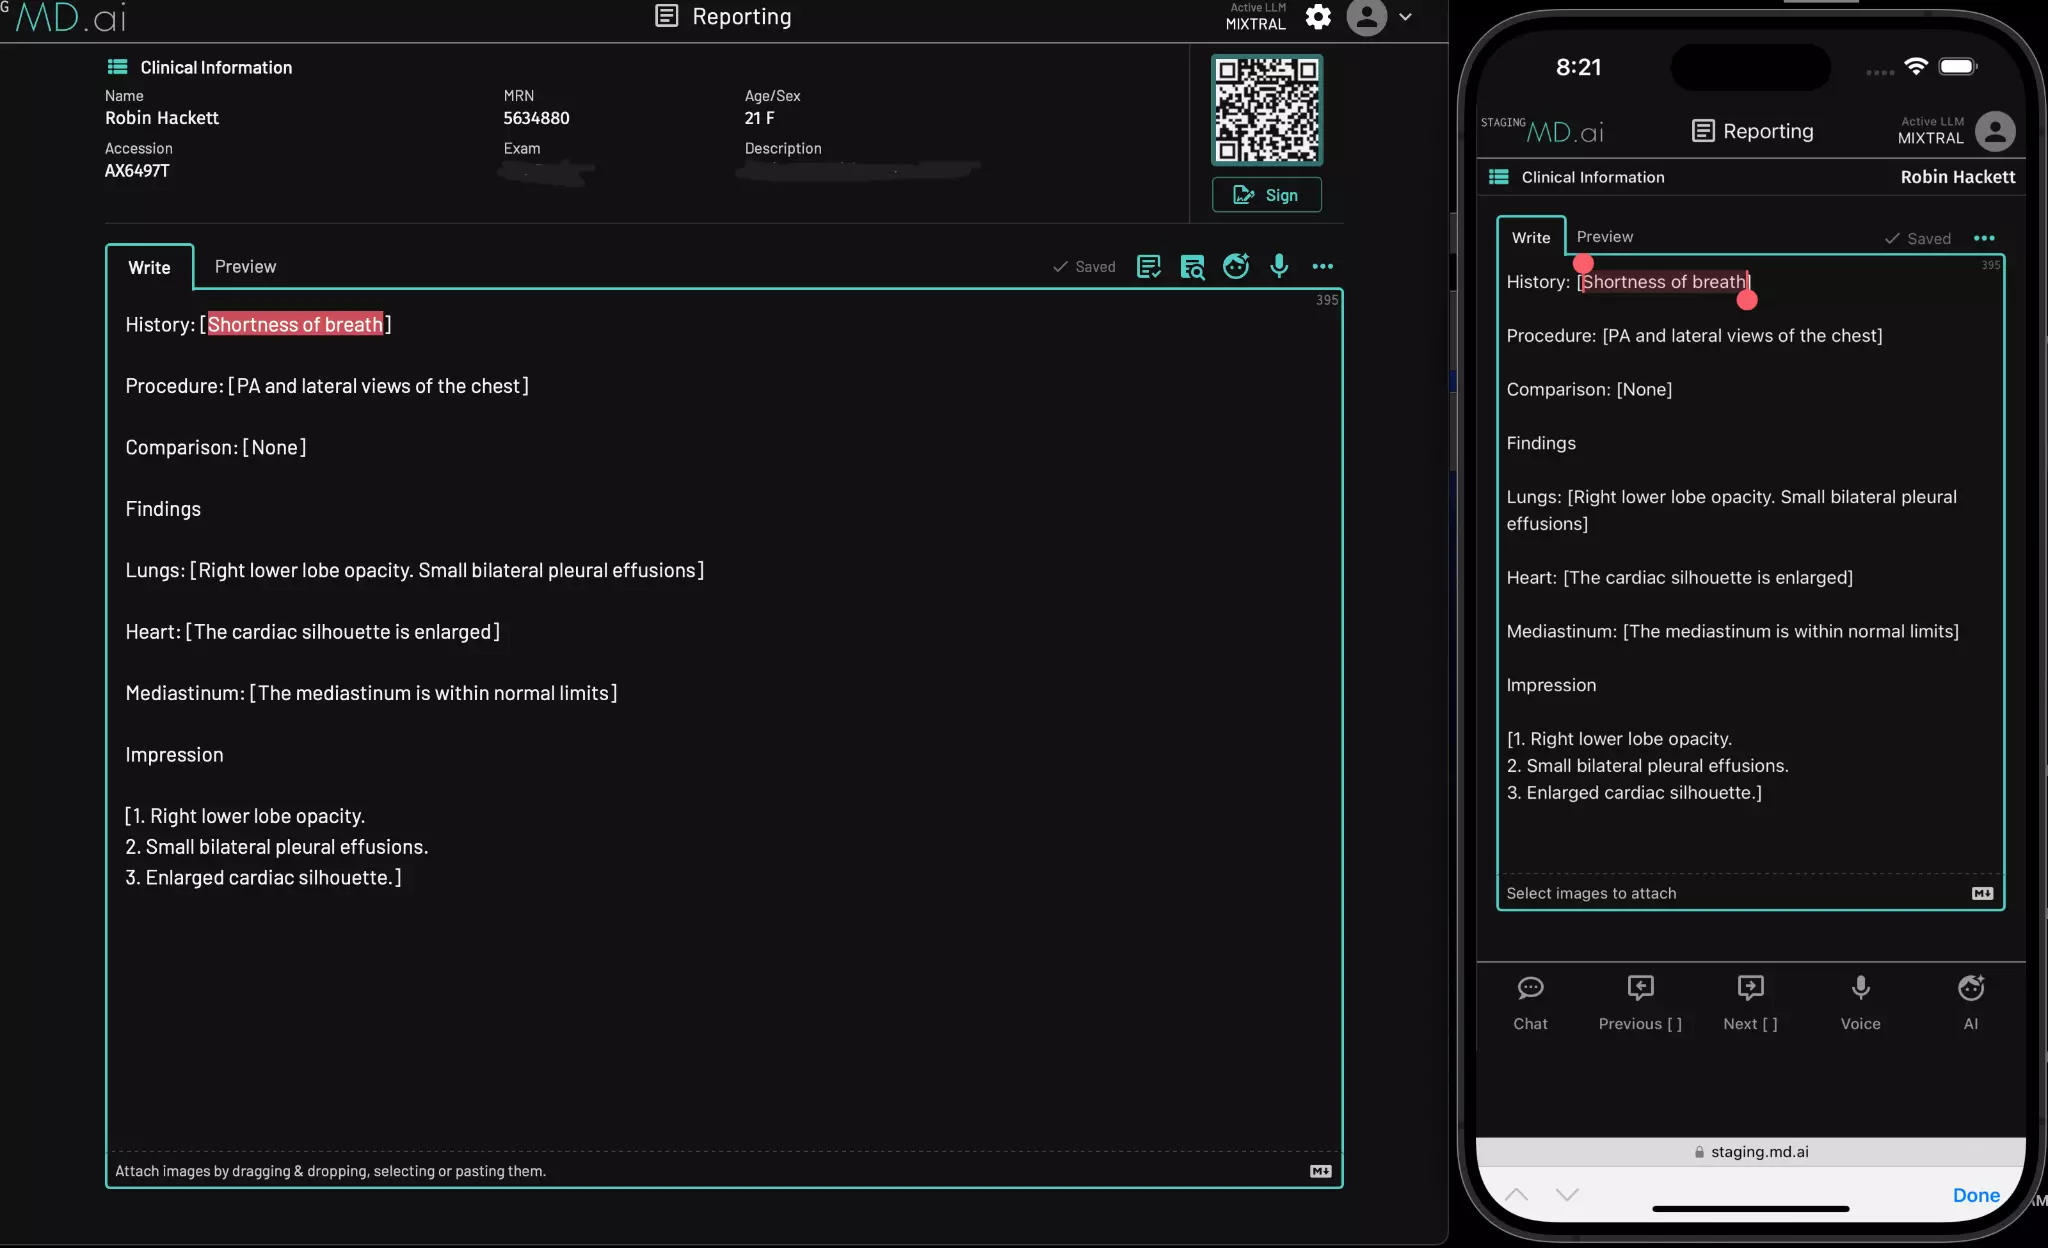
Real-time synchronization across devices can be activated via a QR code or 4-digit pin code.
Use your phone as a speech mic
Dictate on your phone and edit on a computer. Click on the QR code to enlarge the image, or scan the QR code with your phone.
Edit reports from any workstation or remotely
Transfer report ownership
Enabling report ownership transfer allows for second opinion or transcriptionist workflows. For more advanced workflows requiring prelim reports, please see the prelim workflows section.
User A who drafts a report can simply close the report without signing it. The draft is automatically saved.
User B who has access to the same exams from the same worklist can take over the draft report to review or edit. For example:
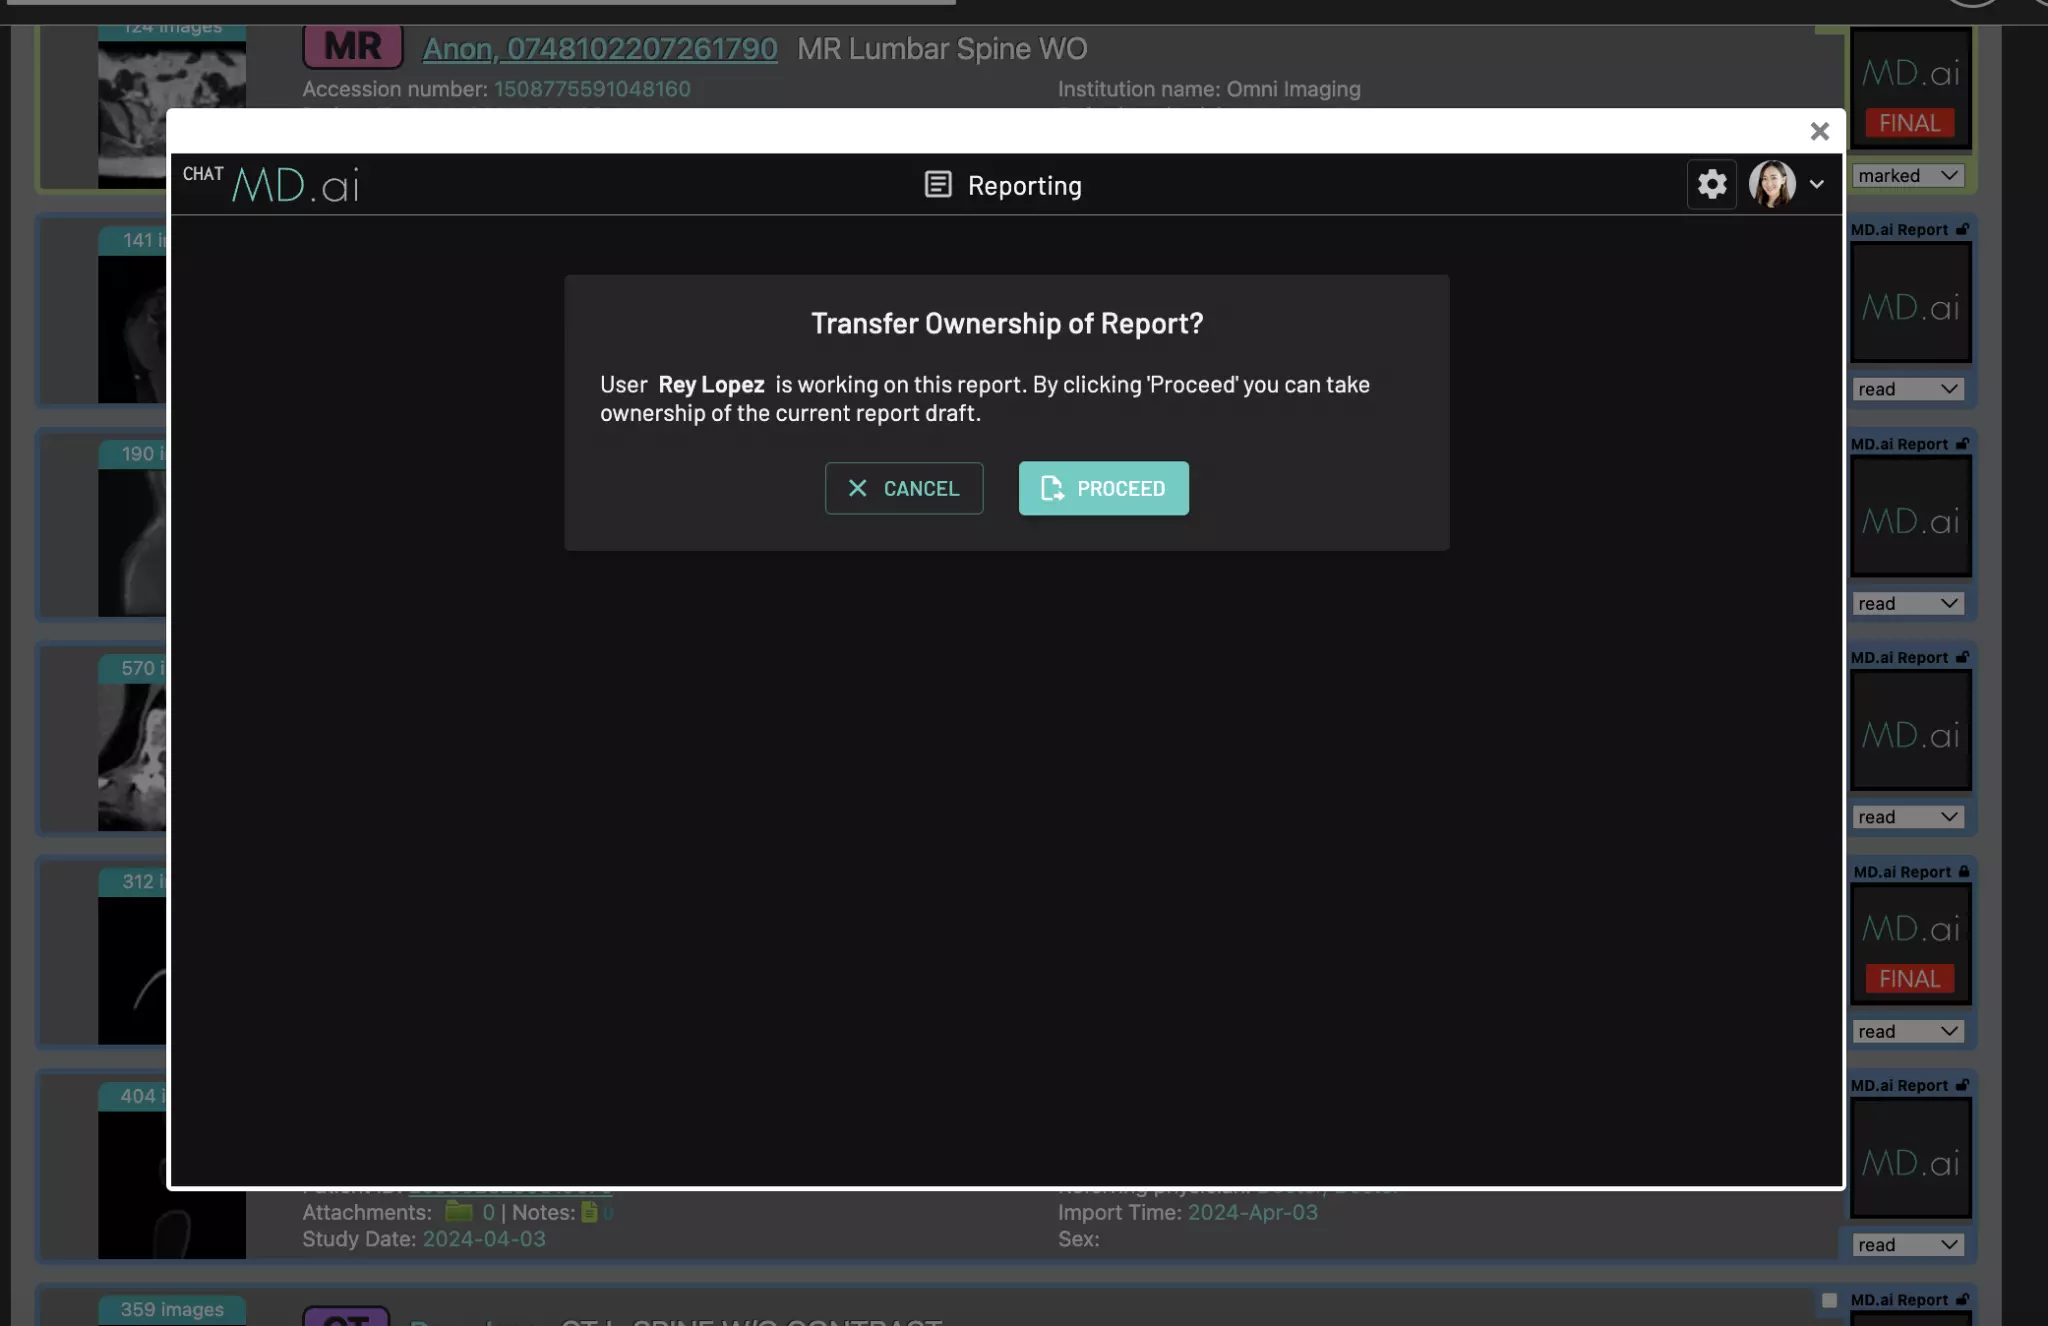
After User B is done reviewing, they can either sign the report or simply close the reporting window. All changes are saved in real-time for User A to review or sign.
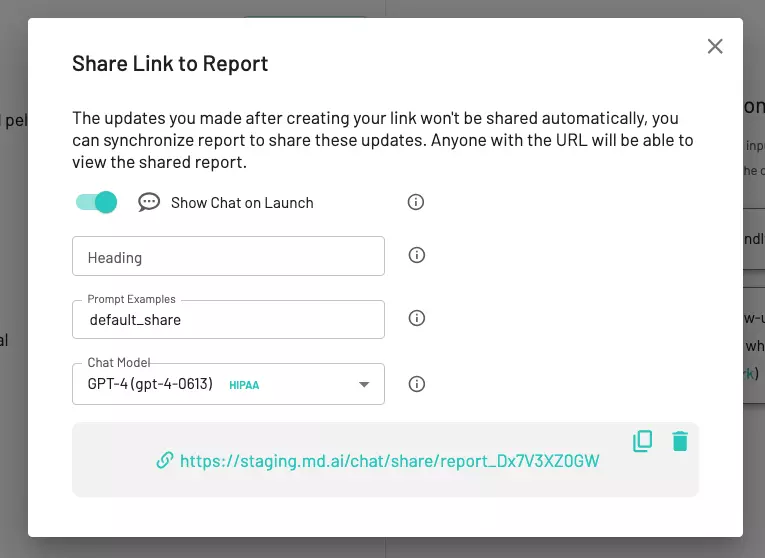
Report share
If enabled, in addition to sharing report text back via HL7, you can generate a report share link to share reports with referring providers or patients.
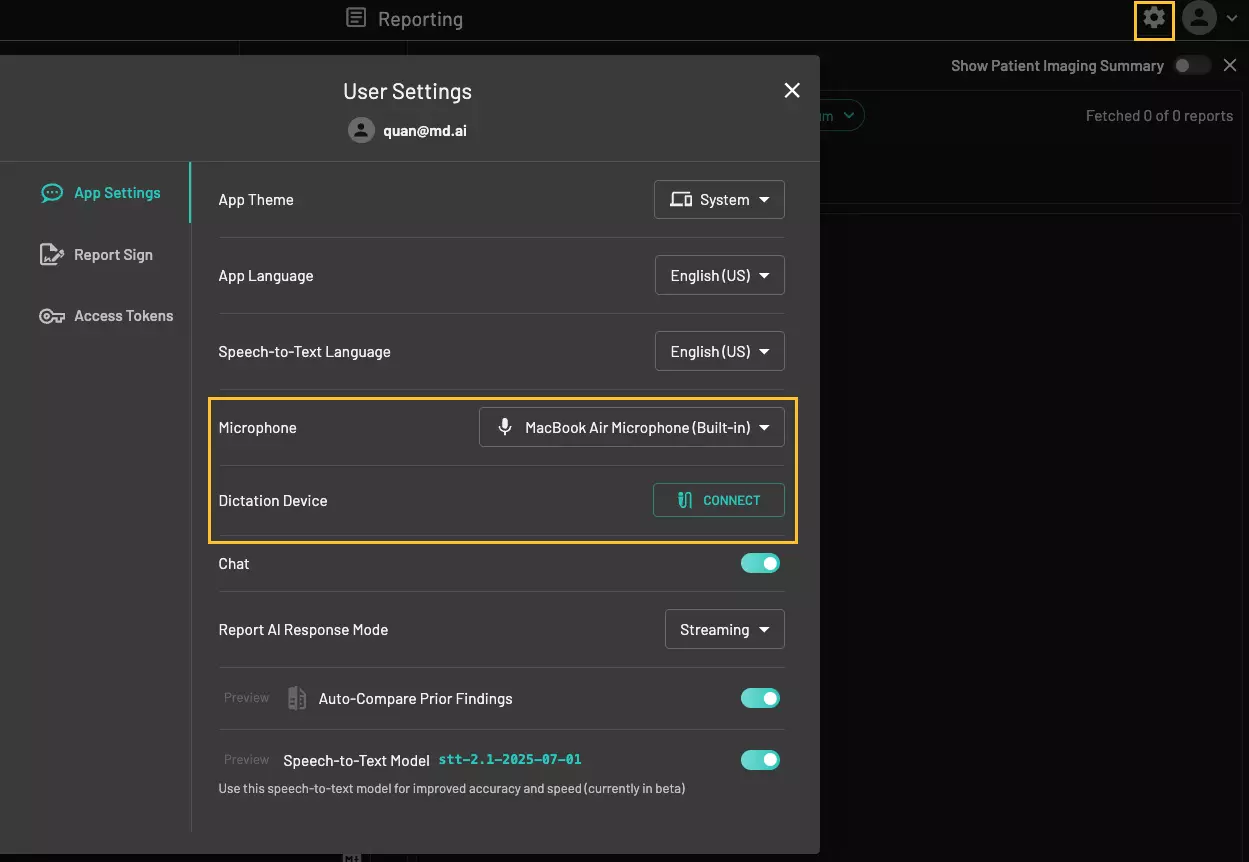
Speech microphones
We support various speech microphone models. Here are the speech mics we currently support:
- SpeechMike Premium range
- SpeechMike Premium Touch range
- SpeechMike Premium Air range
- PowerMic III
- PowerMic 4
Connect your speech mic in user settings and make sure the correct mic is selected.
Here is a video of the steps involved:
Mic buttons
| Function | Mic Button | Philips SpeechMike* | PowerMic* |
|---|---|---|---|
| Mic recording on/off Click to start recording key findings, then click again to stop recording when finished. | record | ✓ | ✓ |
| -i- | ✓ | ||
| Next [ ] field | eol | ✓ | |
Forward button (left of recorder) | ✓ | ||
| Previous [ ] field | instr/ovr | ✓ | |
Backward button (right of recorder) | ✓ | ||
| AI button | rewind | ✓ | ✓ |
*Philips SpeechMike models: Premium LFH 3500/3600, Premium Touch SMP 3700/3800, Premium Air 4000/4010 *PowerMic models: III, 4
Other report settings
Additional report settings can be accessed through the "Report Actions" button in the report toolbar:

- Audio Player: show audio player
- Auto Format: enable speech auto-formatting
- Dictation Follows Cursor: cursor movement during active transcription will either insert text at the current cursor location (when enabled), or split text between the previous and current cursor locations (when disabled)
- Auto Template Insertion: automatically preload the most appropriate template on exam launch
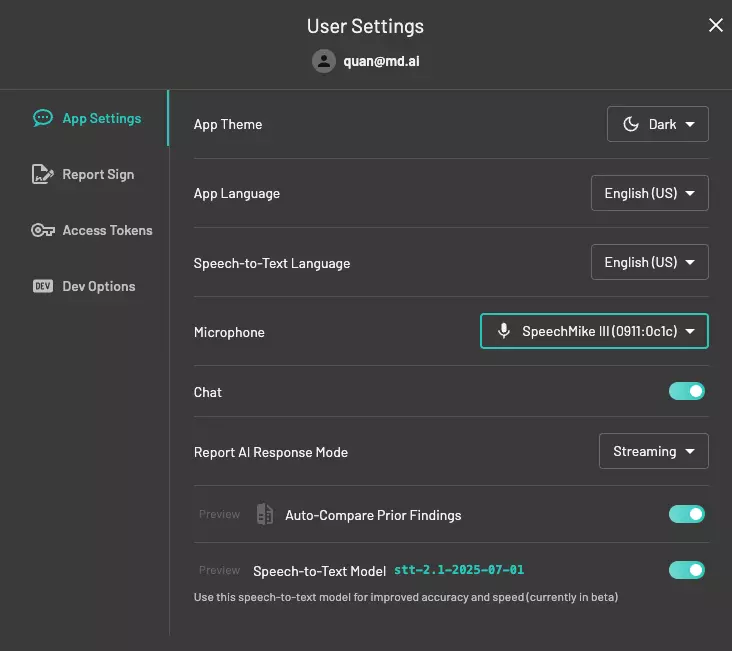
Other user settings
User Settings can be accessed by clicking the button next to your profile picture in the top right corner.
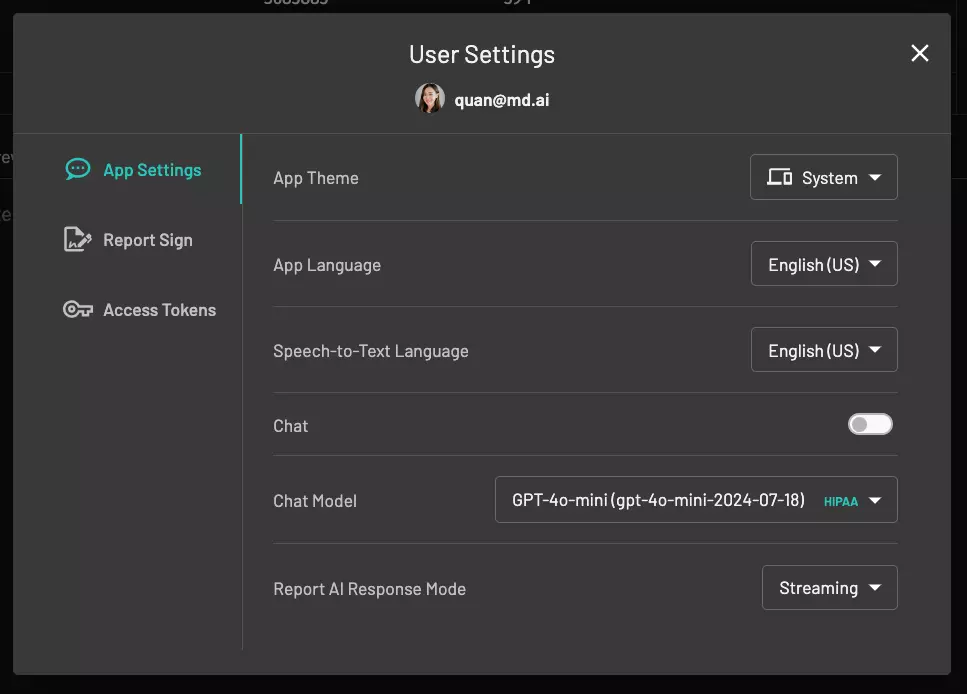
App settings
-
App theme: light or dark mode
-
App language: change to your preferred UI language
-
Speech-to-text language: dictate reports in your preferred language
-
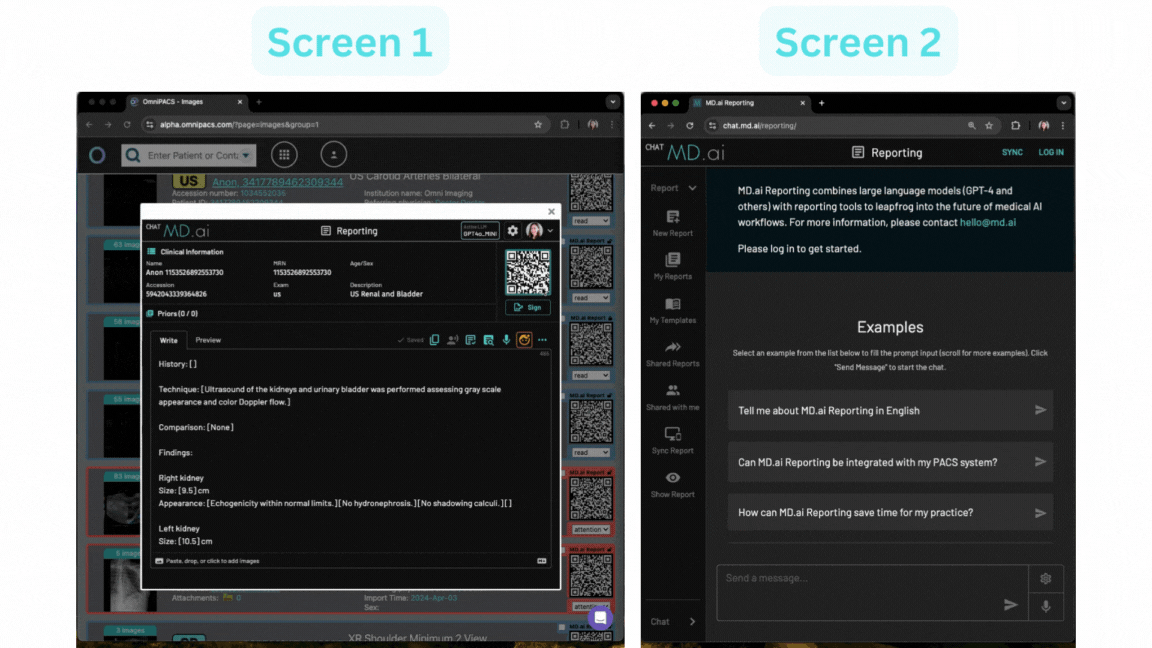
Chat: open chat panel to interact with HIPAA-compliant large language models (LLMs)
-
Chat model: select a LLM to use in the chat panel (note: this does not affect the report AI models)
-
Report AI response mode:
-
Streaming - see the process of key findings mapping
-
Instant - only see the final results
-
Report sign
See the customize report sign workflow section above.
Access tokens
Access tokens are required for authentication when using the report generation API.
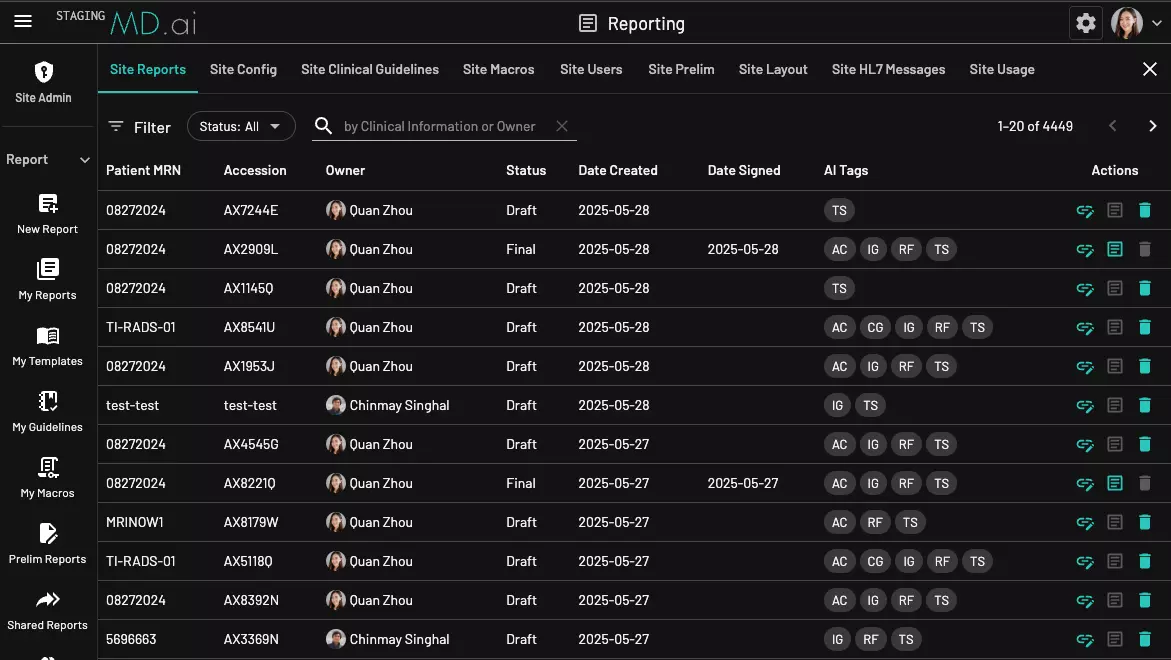
Site admin settings
Site reports
See all reports for a given site, including drafts and finalized reports.
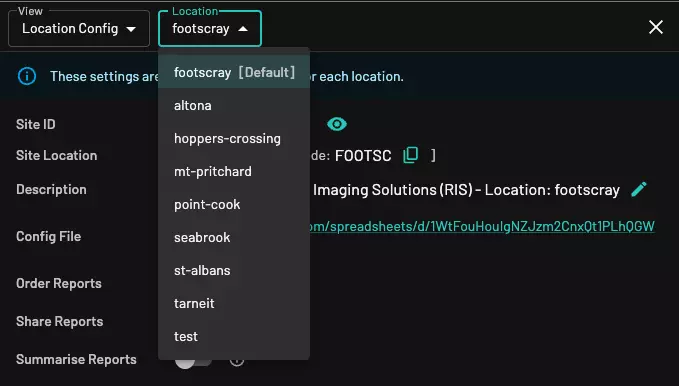
Site config
Allows site administrators to manage settings for a site and customize the final report format.
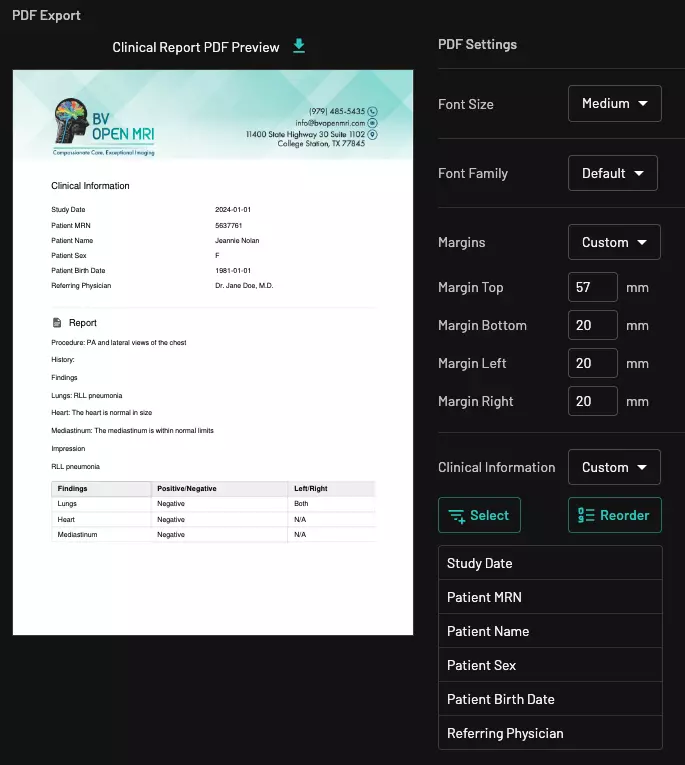
If your site has multiple locations, you may configure the report format and manage users separately for each location.
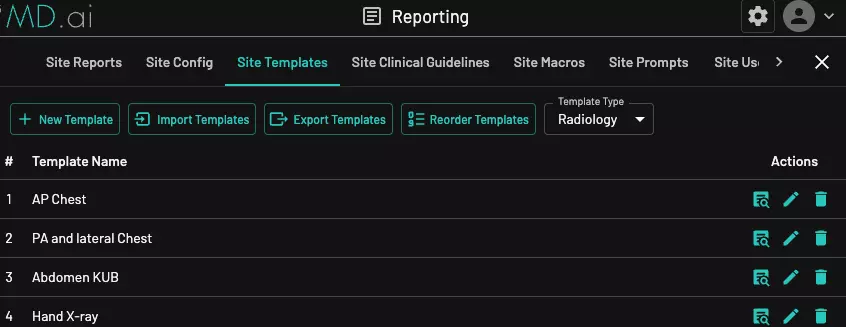
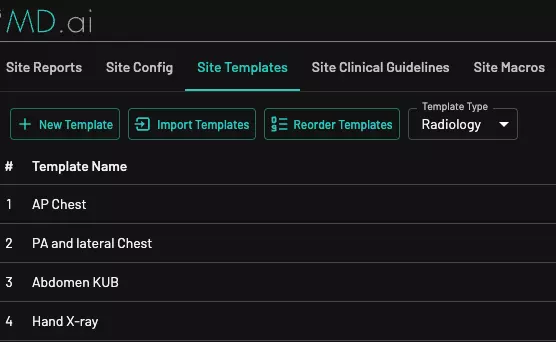
Site templates
Here, site administrators can create/import/edit system templates for a given site. These templates are available to all users on the same site/location.
Site clinical guidelines
Here, site administrators can add clinical guidelines for a given site. These guidelines are available to all users on the same site/location.
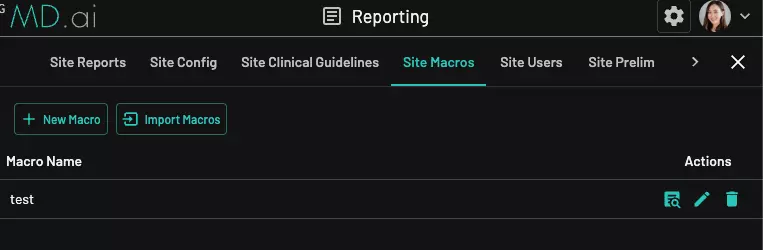
Site macros
Create/Import/Edit macros for a given site. These macros are available to all users on the same site/location.
Video: Create a macro
Video: Import and bulk delete macros
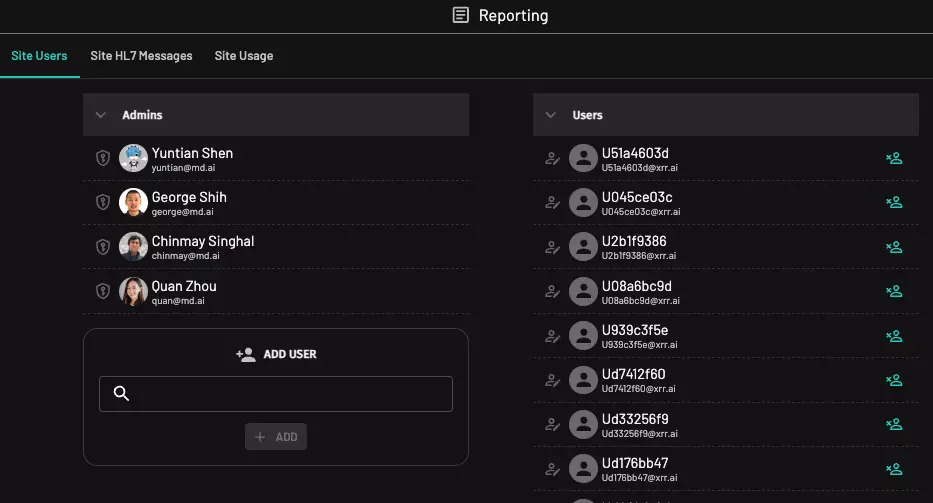
Site users
Add and manage regular users. If you wish to add someone as a site administrator, please contact the MD.ai team.
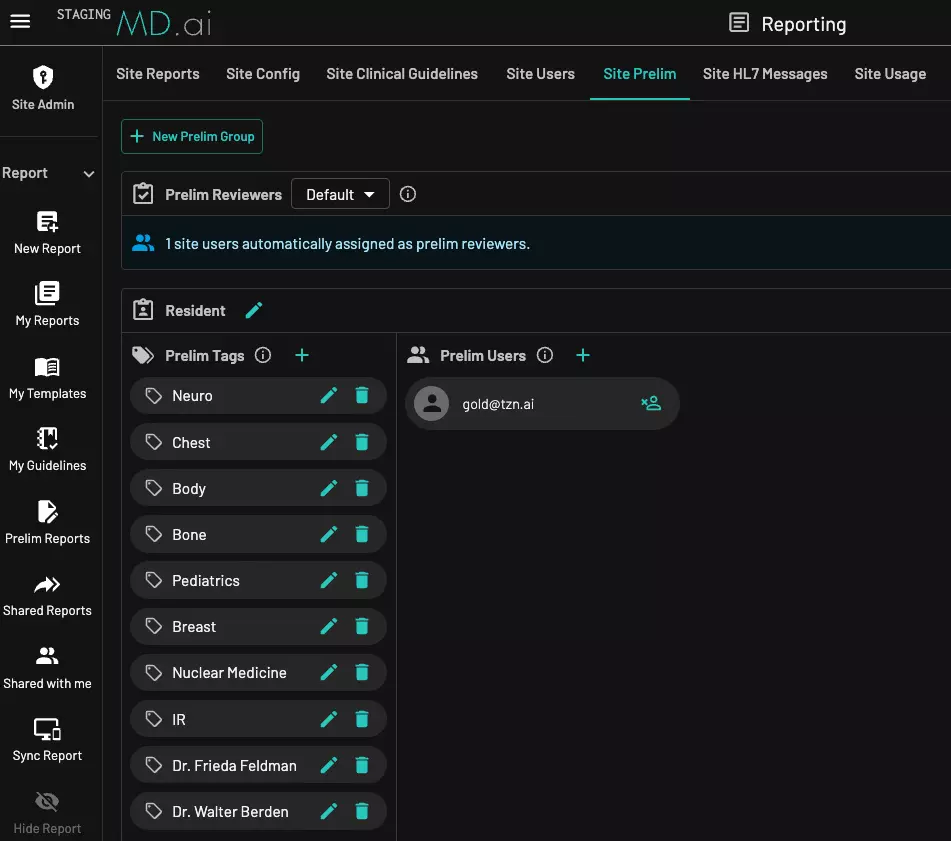
Site prelim workflows
Can define advanced prelim workflows, such as with residents, assistants, or transcriptionists. See the prelim workflows section for more details.
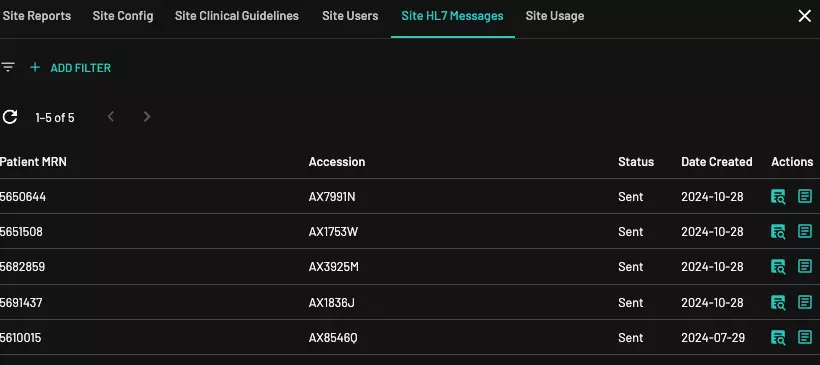
Site HL7 messages
View and manage HL7 messages and monitor their status.
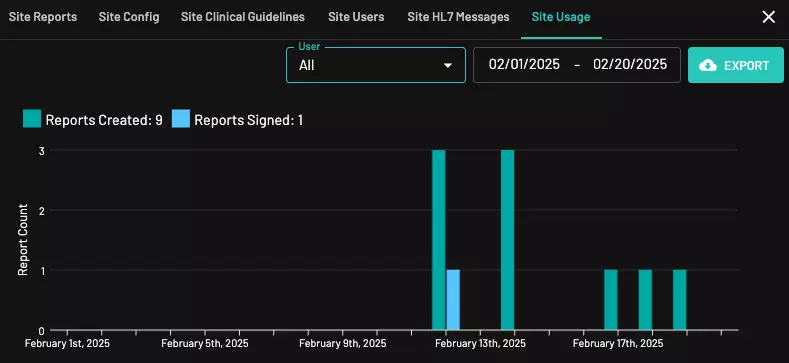
Site Usage
The "Site Usage" dashboard allows site administrators to track all users' activities by date or date range and download the data as a CSV file.