
Quickstart
Open a project and make your first annotations in a few minutes
This guide is for annotators who have been invited to a project. If you're setting up a project, start with Create a Project.
1. Sign in
Open the invitation email and click the link to the project. Sign in, or sign up, with the same email address the invitation was sent to. See Sign in if you have trouble.
Use Chrome on a laptop or desktop computer. See the system requirements.
2. Open the workspace
The project opens in the workspace. If the project has a data use agreement, read it and click Accept and Continue.
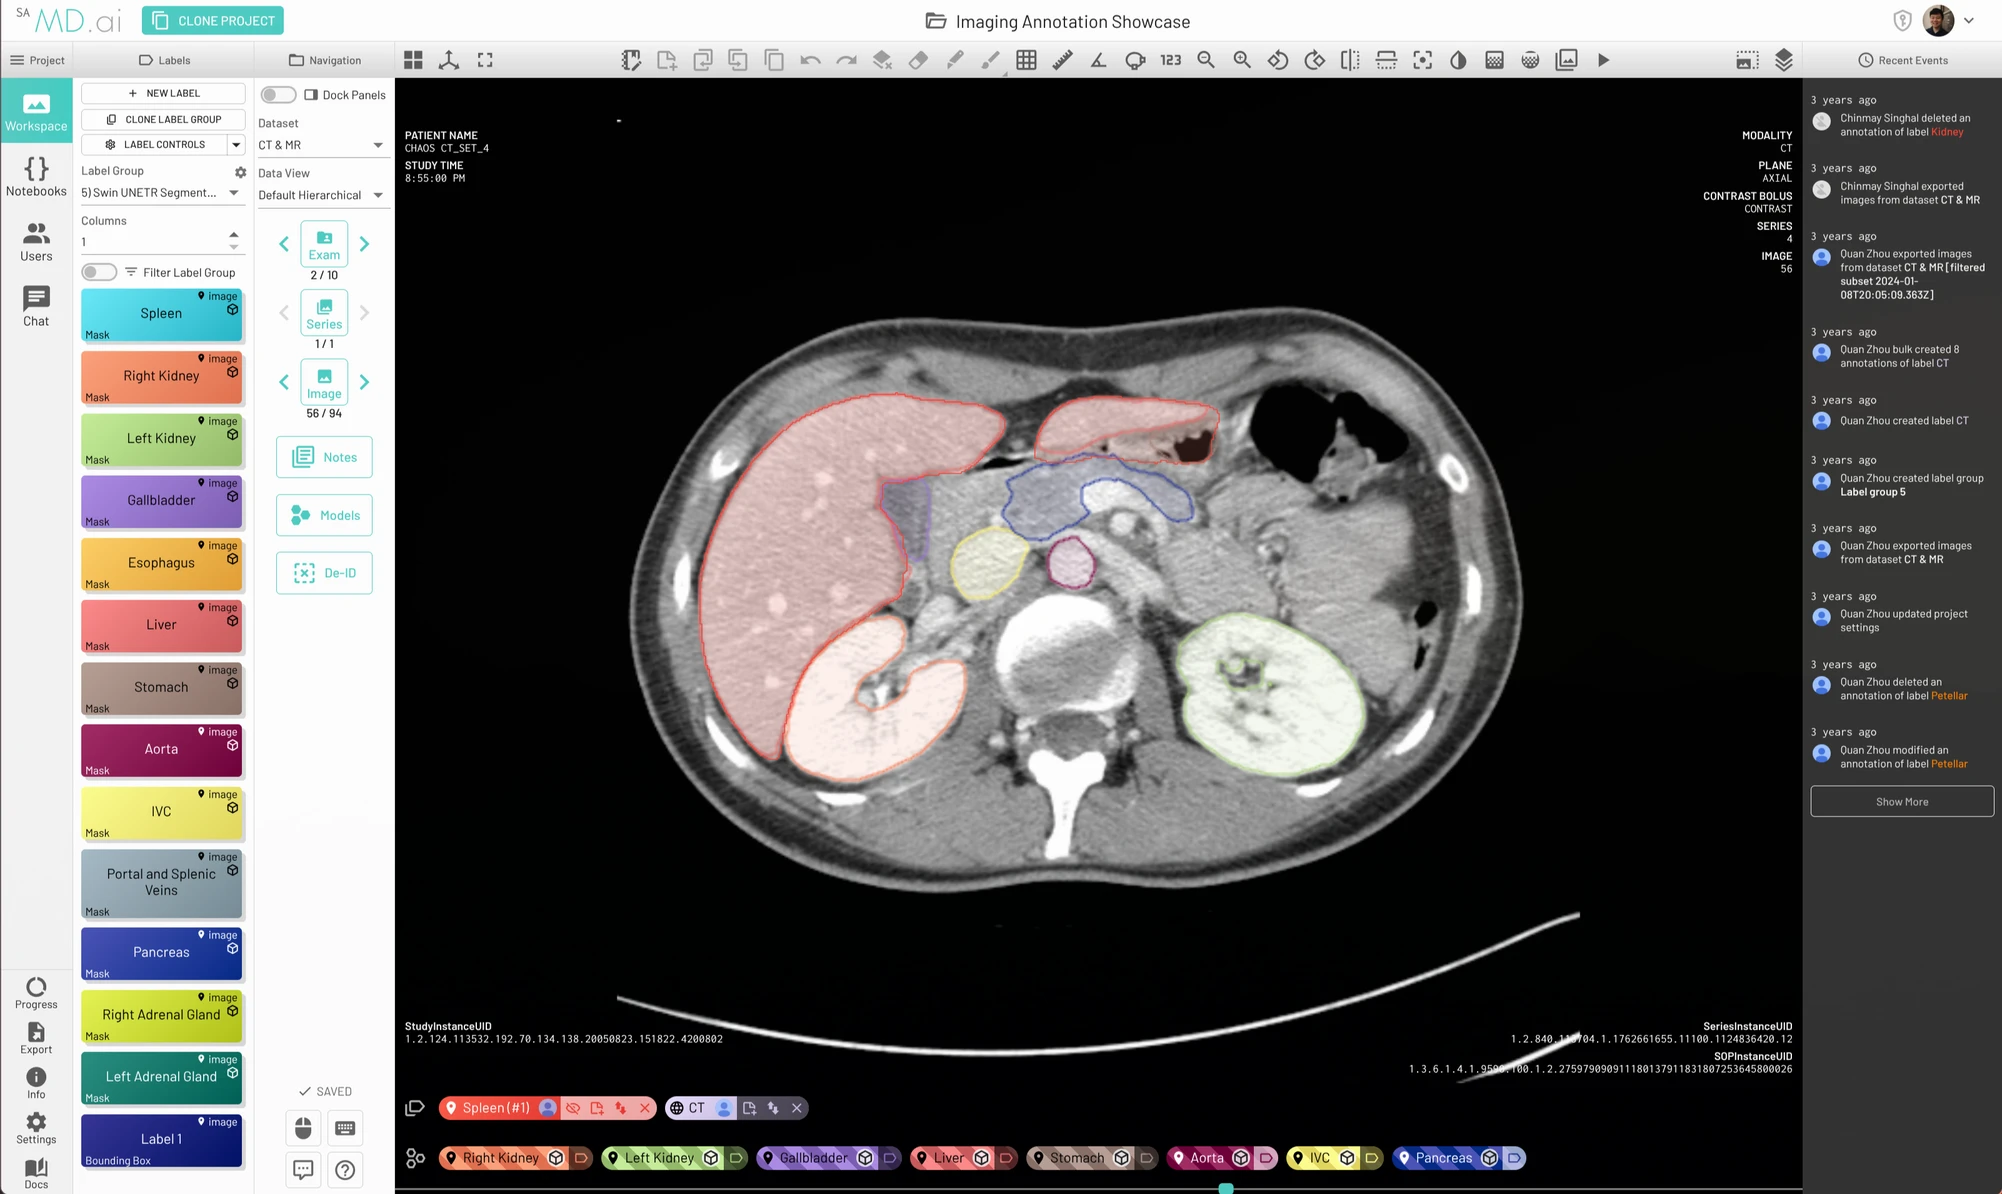
- Labels are on the left. Hover over a label to see its instructions.
- Navigation lists the exams, series and images you can work on. If you've been assigned exams, you see only those.
- The viewer shows the images.
See Workspace Overview for a full tour.
3. Look through the images
| To | Do |
|---|---|
| Scroll through images | Scroll wheel, or ← / → |
| Change series | ↑ / ↓ |
| Next / previous exam | . / , |
| Adjust window/level | Left-drag |
| Zoom / pan | Right-drag / middle-drag |
| Reset the view | Alt+R |
See Viewing Images for more tools.
4. Annotate
- Click a label. It becomes active, and its name appears above the image.
- If it's a global label, such as
Normal, it's applied. If it's a local label, draw it on the image. - Click
Inactivate(Alt+W), or move to the next image.
Your work saves automatically.
5. Fix mistakes
- Undo the last change to the active annotation with
Ctrl/⌘+Z. - Edit an annotation:
Shift+click it, then adjust its shape. - Delete an annotation: click the X on its tag below the image.
Next steps
- Annotate Images: copy annotations between images, interpolate, and annotate videos.
- Annotation Tools: how to draw each shape, and AI-assisted segmentation.
- Keyboard Shortcuts: work faster.