Label Groups
Easy annotation management can be achieved by creating different label groups to host labels independently for different users. While creating a new label you can either chose to add labels to the Default Group or Create New Group to add labels to a new label group. You can also choose to add labels to the Metadata label group using this setting. By default, new labels will be added to the Default Group.
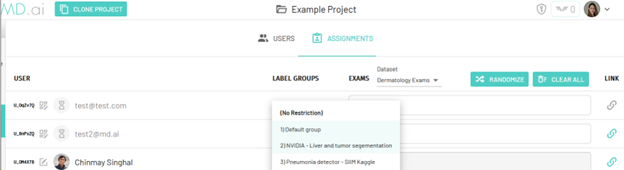
Project administrators can choose to leave users unassigned to a specific label group, the default option, which will allow users to view and annotate with labels from each label group. Blinding and more detailed annotator control can be achieved by restricting users to one or multiple label groups.
You can also choose to lock the label group to prevent users from adding new labels by toggling the No Adding New Labels tag or prevent users for creating new annotations by toggling the No Applying Labels tag in the label group settings window. Label groups can also be deleted.
Label Group Settings
The settings (gear) icon next to the label group name will bring up the label group settings menu -

Here you edit the name and description for the label group to help improve accessibility for the annotators.
As an admin you can also choose to toggle the following options -
- No Adding New Labels: This prevent users from adding any new labels to the label group.
- No Applying Labels: This prevents users from creating annotations using this label group.
Cloning a Label Group
From the label group settings menu, copy the Clone Code for the label group that you wish to clone. Then go to the destination project page, click on the Clone Label Group button and paste the copied clone code to create an exact copy of the desired label group.