Deploying models
Before following the steps for deploying your own model it is required that you already have an existing project that you want to run your experiments or create a new project following the steps mentioned in the Create project section.
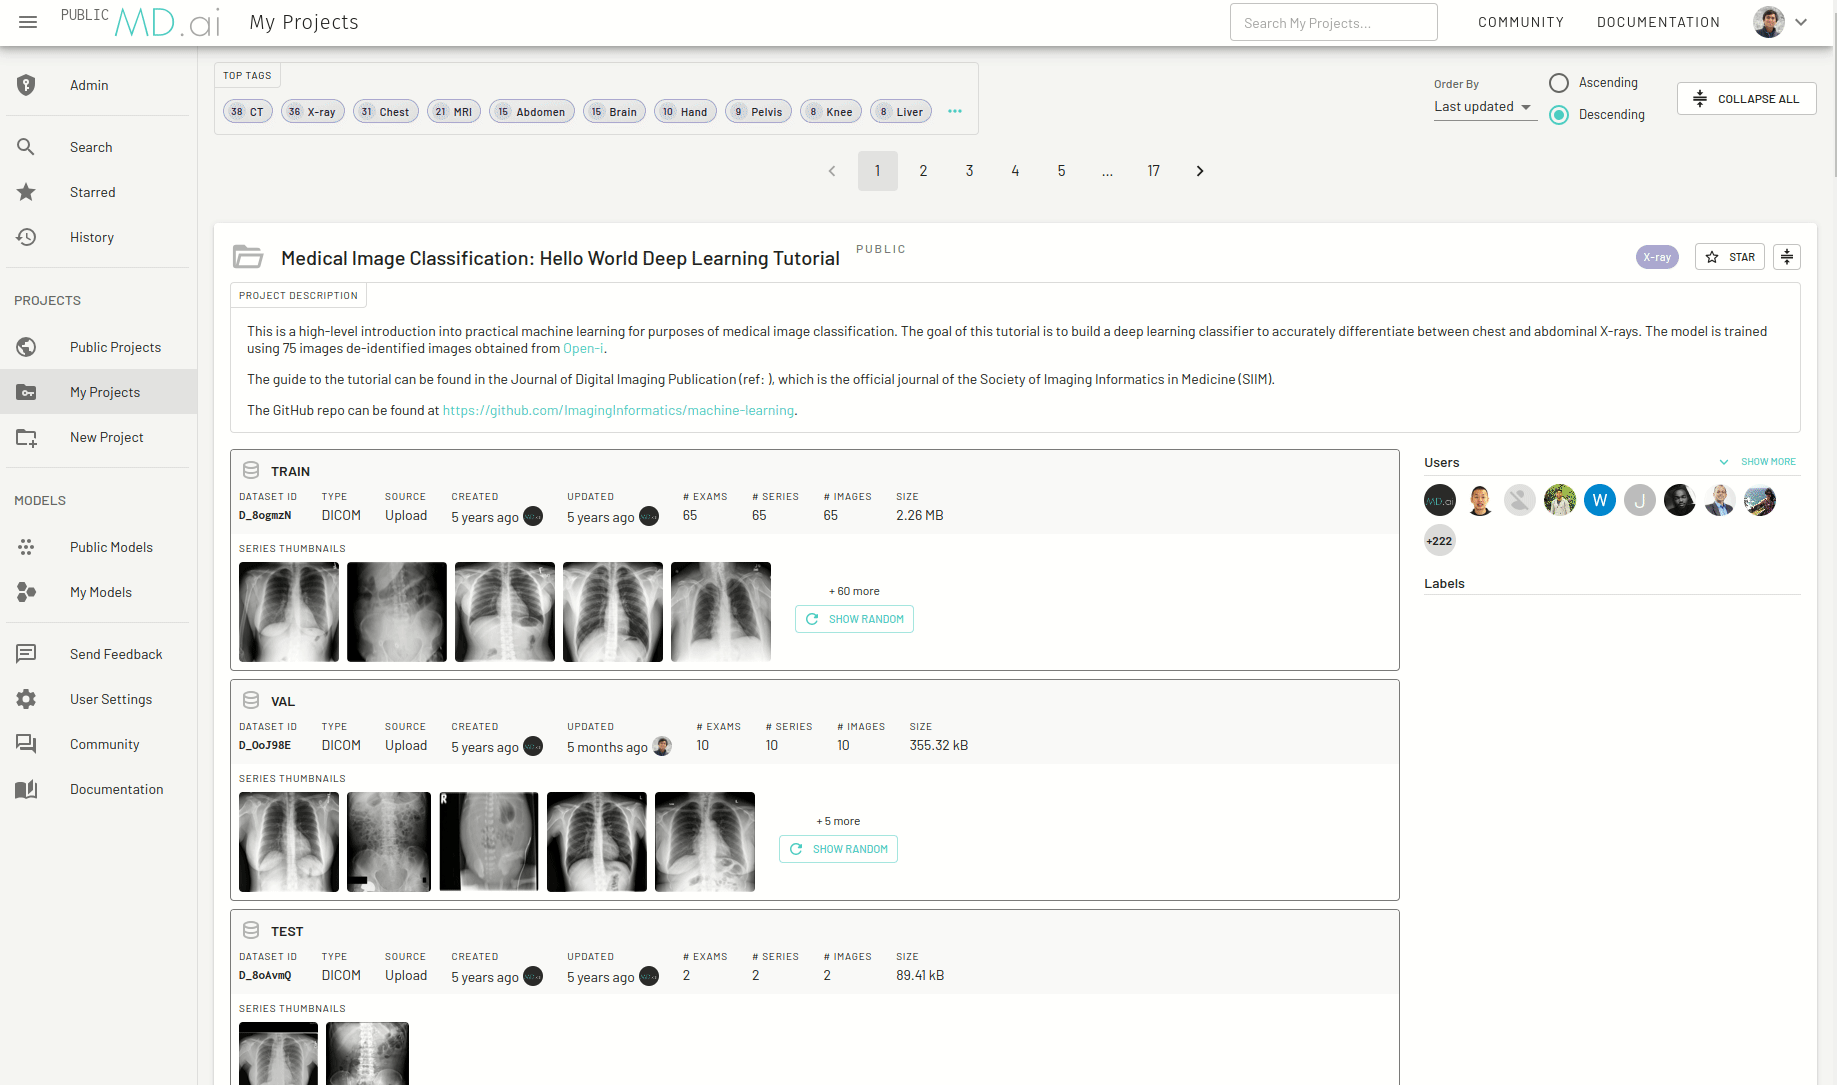
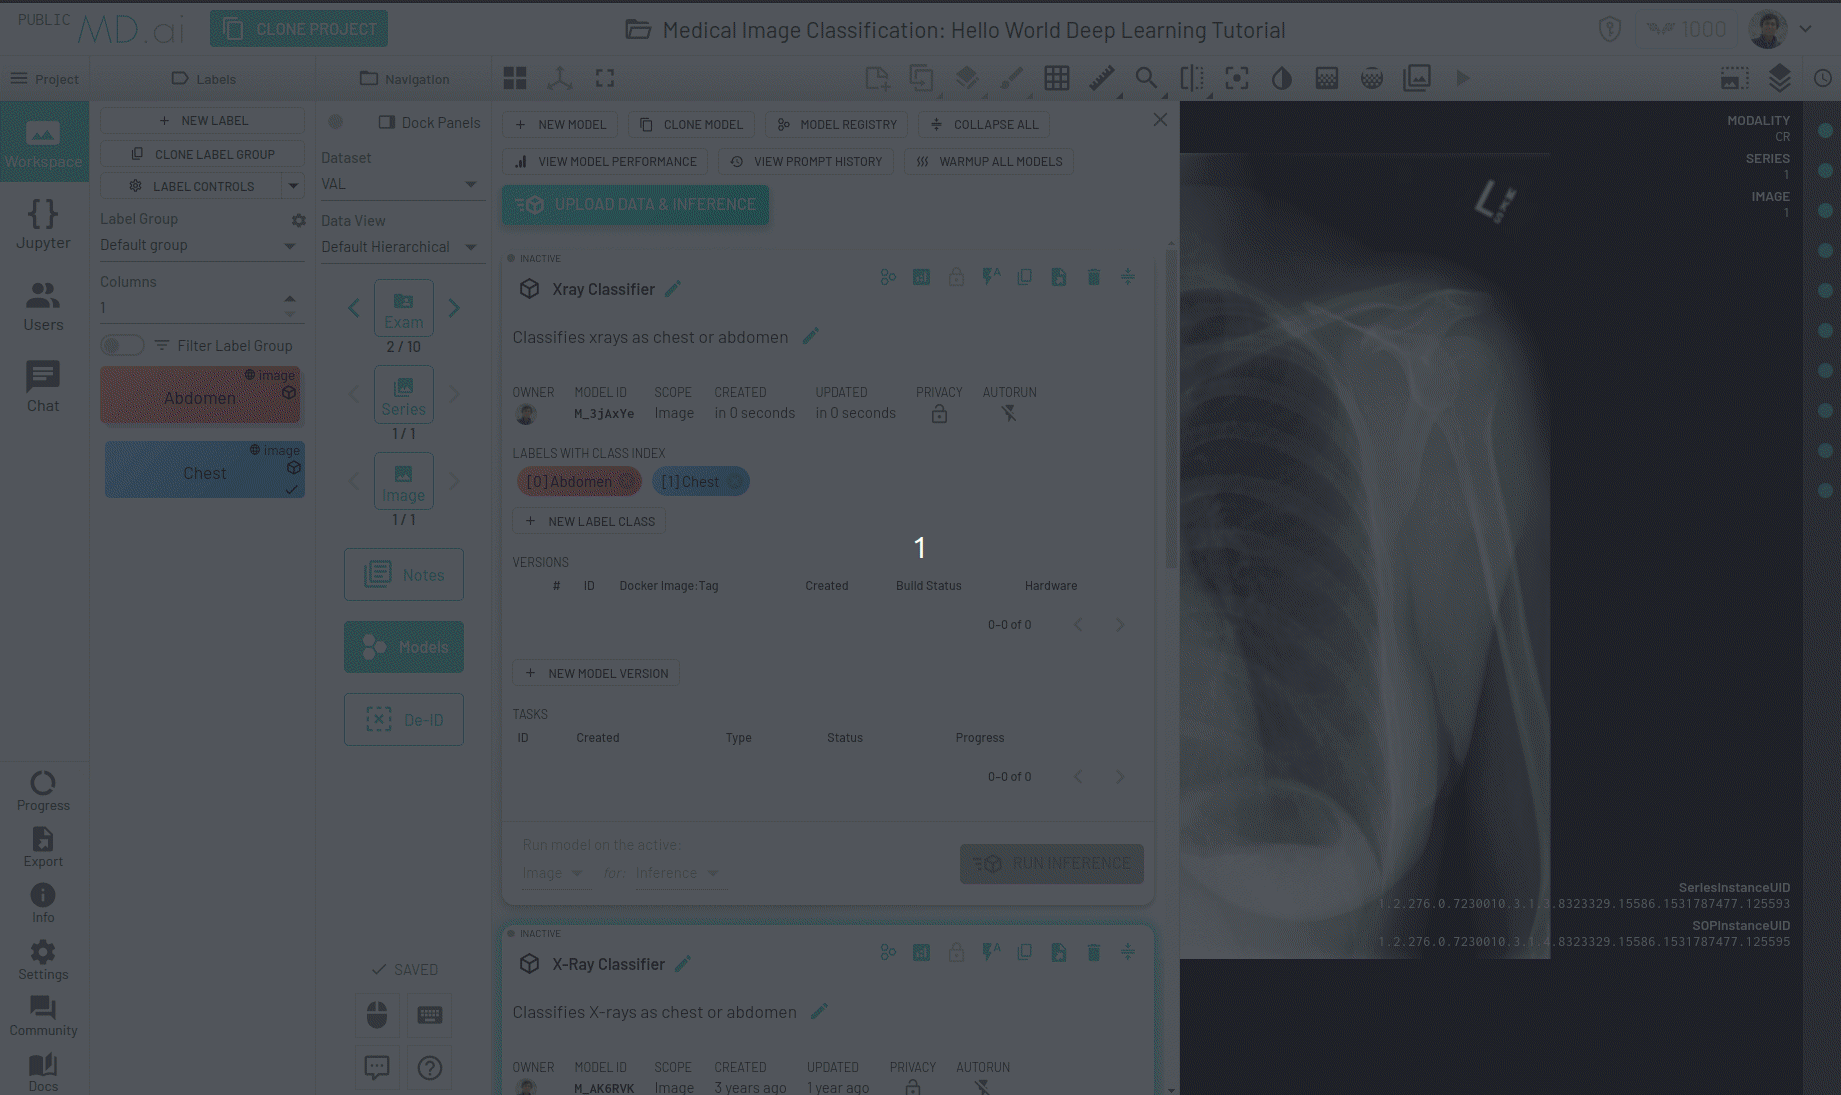
For this tutorial we will go through a simple classification task titled Medical Image Classification: Hello World Deep Learning Tutorial which classifies Xrays as either chest or abdomen. This project is hosted on our platform.
Creating a new model instance
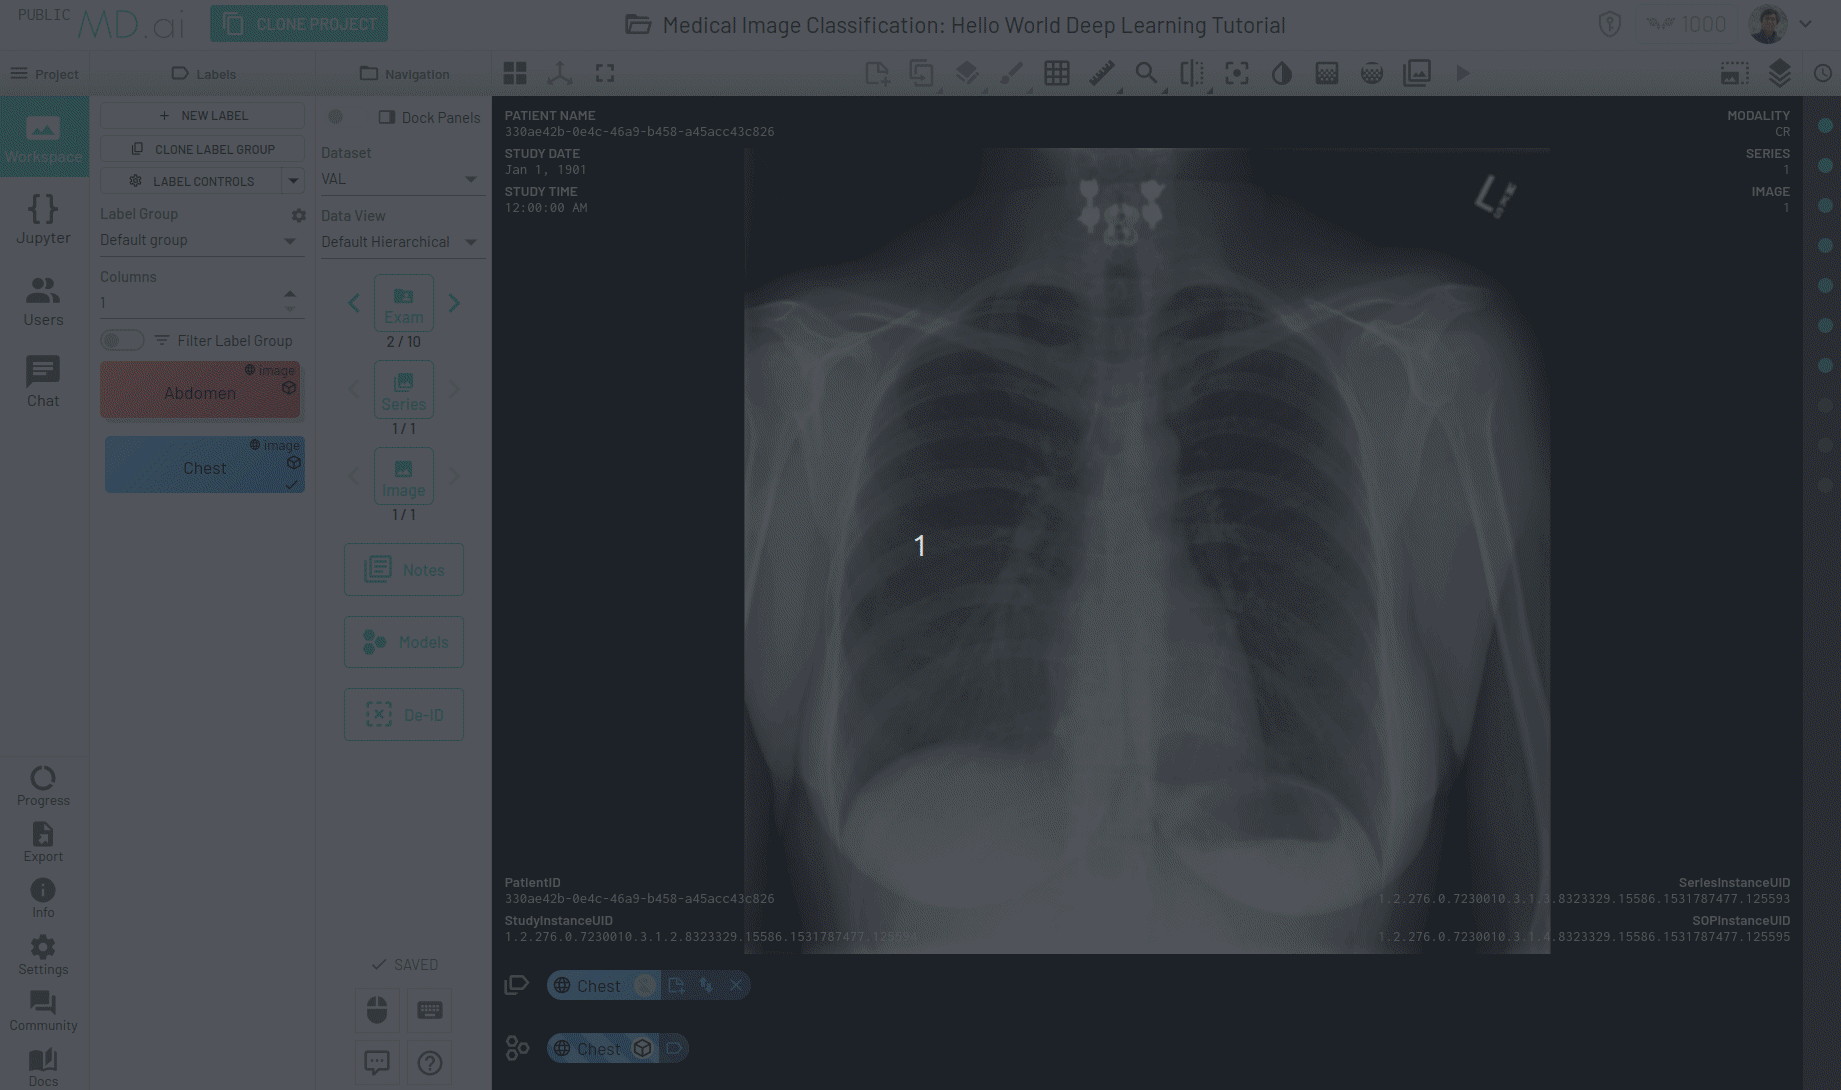
Open the MD.ai tool and select your project by going to the My Projects section and clicking on the Launch button.
Once inside, click on the Models tab and select New Model. Enter a name for your model and add a description if you want. Next you need to choose the scope for your model. The model scope determines how batching of inputs is carried out -
- If your model takes as input an entire study/exam, choose the scope as
Exam. - If your model takes as input a single volumetric series, choose the scope as
Series. - If your model takes as input a single image at a time, choose the scope as
Image.
There are a bunch of settings that you can choose for your model including keeping the model private to project users or making it cloneable and accessible to others. Check out the Model Settings page for more details.
Creating a model assets zip file
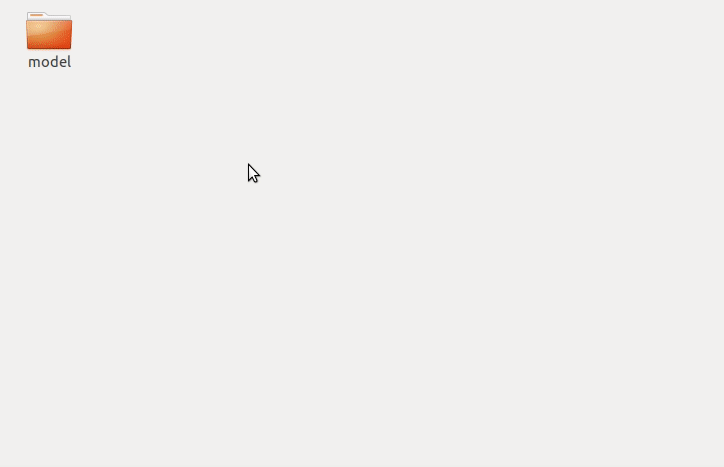
Creating a model instance isn't enough, you need to further create a model version in order to run your models. In order to do that you will first need to create a zip file containing the saved model and the required MD.ai interface code. The following file structure needs to be strictly followed -
model/
  |__ .mdai/
      |__ config.yml            # Contains configuration parameters to be used during bulid
      |__ mdai_deploy.py        # Framework which communicates between the server and model
      |__ requirements.txt      # Lists the libraries needed to run the model
  |__ model_file.pth            # Pretrained model checkpoint file
Create a root folder named model. Inside this folder, store your pretrained model file. Along with this, create a sub folder named .mdai and all the MD.ai interface related build files need to be placed inside this folder. Zip the root folder and your model is then ready to be deployed.
Creating a model version
Now that your model assets are wrapped in a zip file, you are ready to deploy your model. Go back to your project and under your previously created model instance, click on the NEW LABEL CLASS button. Here you will have to map the label indices produced by your model to the corresponding labels you have created on our platform. Do this for all target labels that you might have. For eg. in this case we will map the class Abdomen to 0 and Chest to 1 because that's how our model was trained to use the classes.
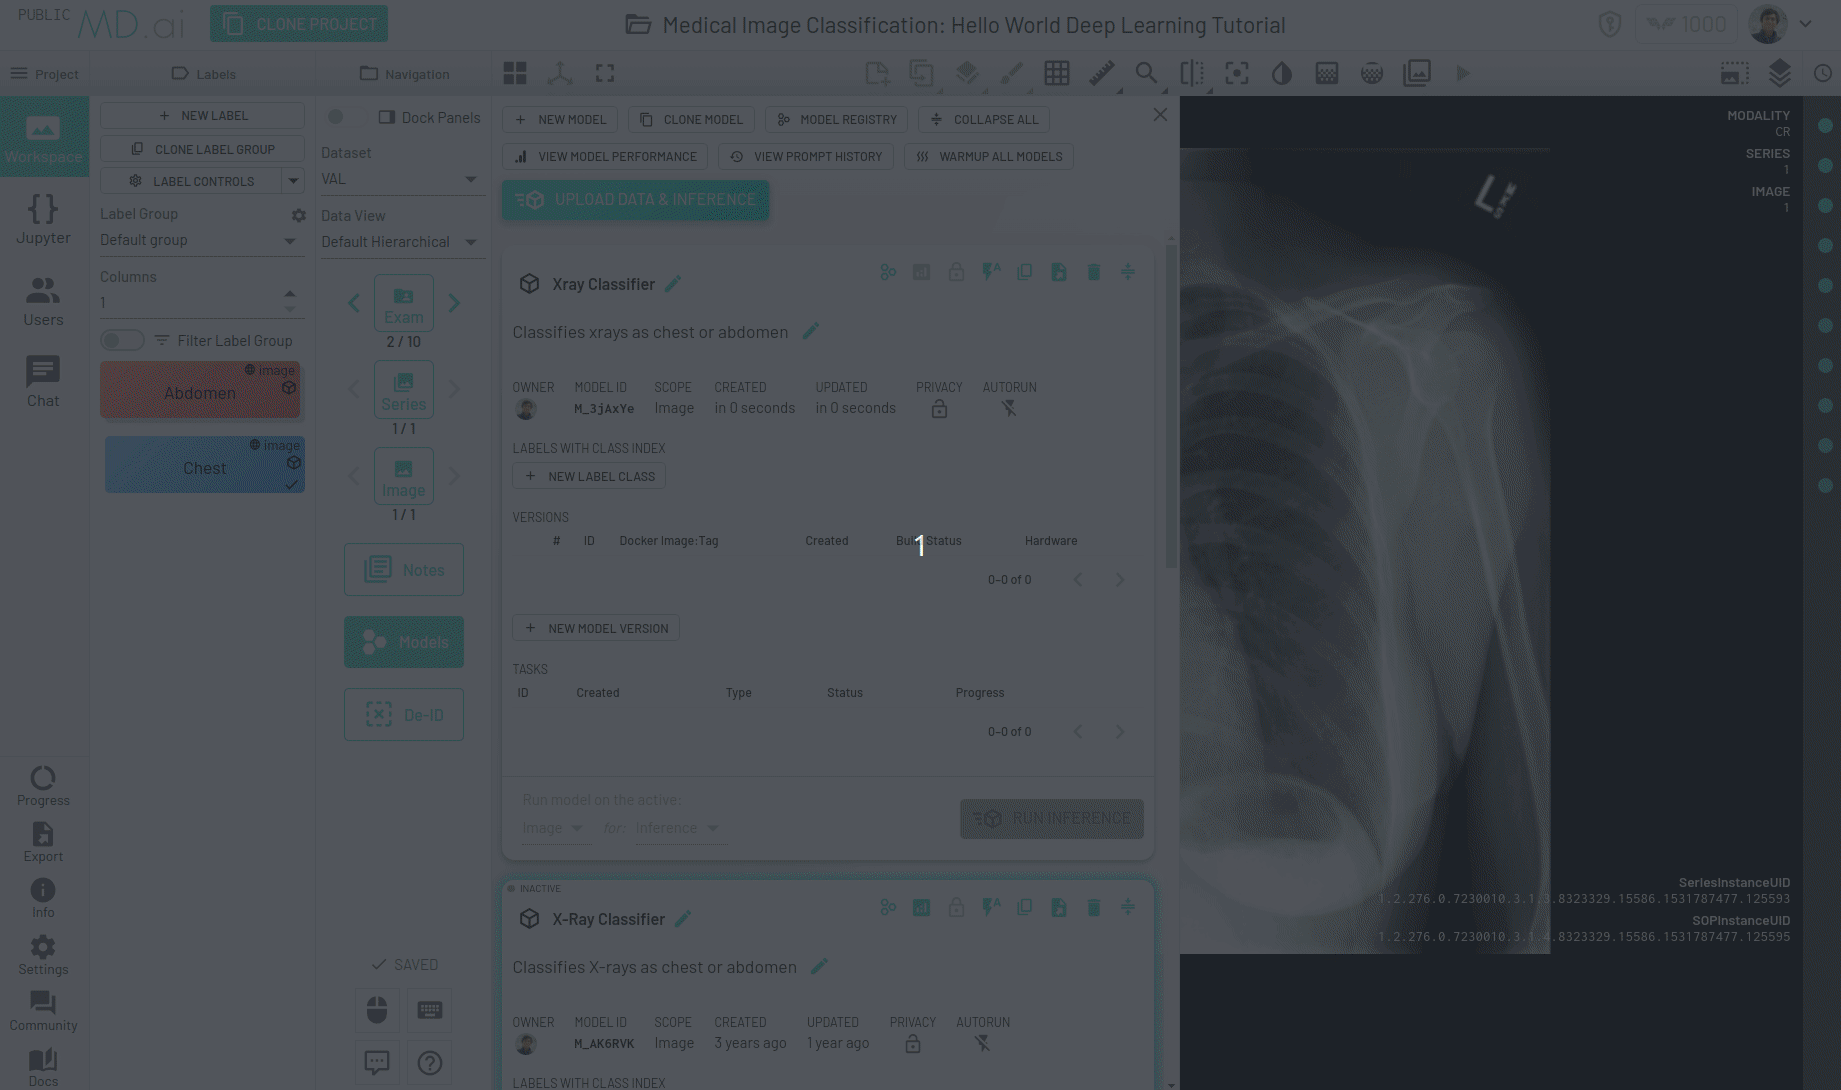
Click on the NEW MODEL VERSION button and perform the following steps -
- Upload Model - Upload the model zip file that you created before.
- Validate Model - This is an automated validation step that checks whether your uploaded zip file conforms to the MD.ai format. An error will be shown in case there are issues with the configs.
- Set Runtime Configs - Select the runtine configuration for your model such as whether you want the model to run on a CPU or a GPU (and which type of GPU). Note that if you add
device_type: cpuin yourconfig.yamlfile, then you will not be able to choose a GPU at this step. - Set Model Args - Enter the values of any arguments that your model might take. These are any key-value pairs that your model can use as inputs furing inference. (optional)
- Build Model - Press on
START BUILDand you model will be prepared for deployment.
The Build status will go from initally Queued to Working to finally Succeeded, when the model has been succesfully deployed on the cloud. You will also receive an email once the model has completed the build stage.
Build status stuck in Working
It might take a while for the model to build depending on the size of your model file, so it's completely normal if the "Build Status" displays "Working" for a while.