De-Identification (DEID)
MD.ai provides a suite of tools for all your data de-identification needs. A separate De-ID panel is available to run pixel level de-identification for removing burnt in Protected Health Information (PHI) on DICOM images as well as DICOM tag de-identification.
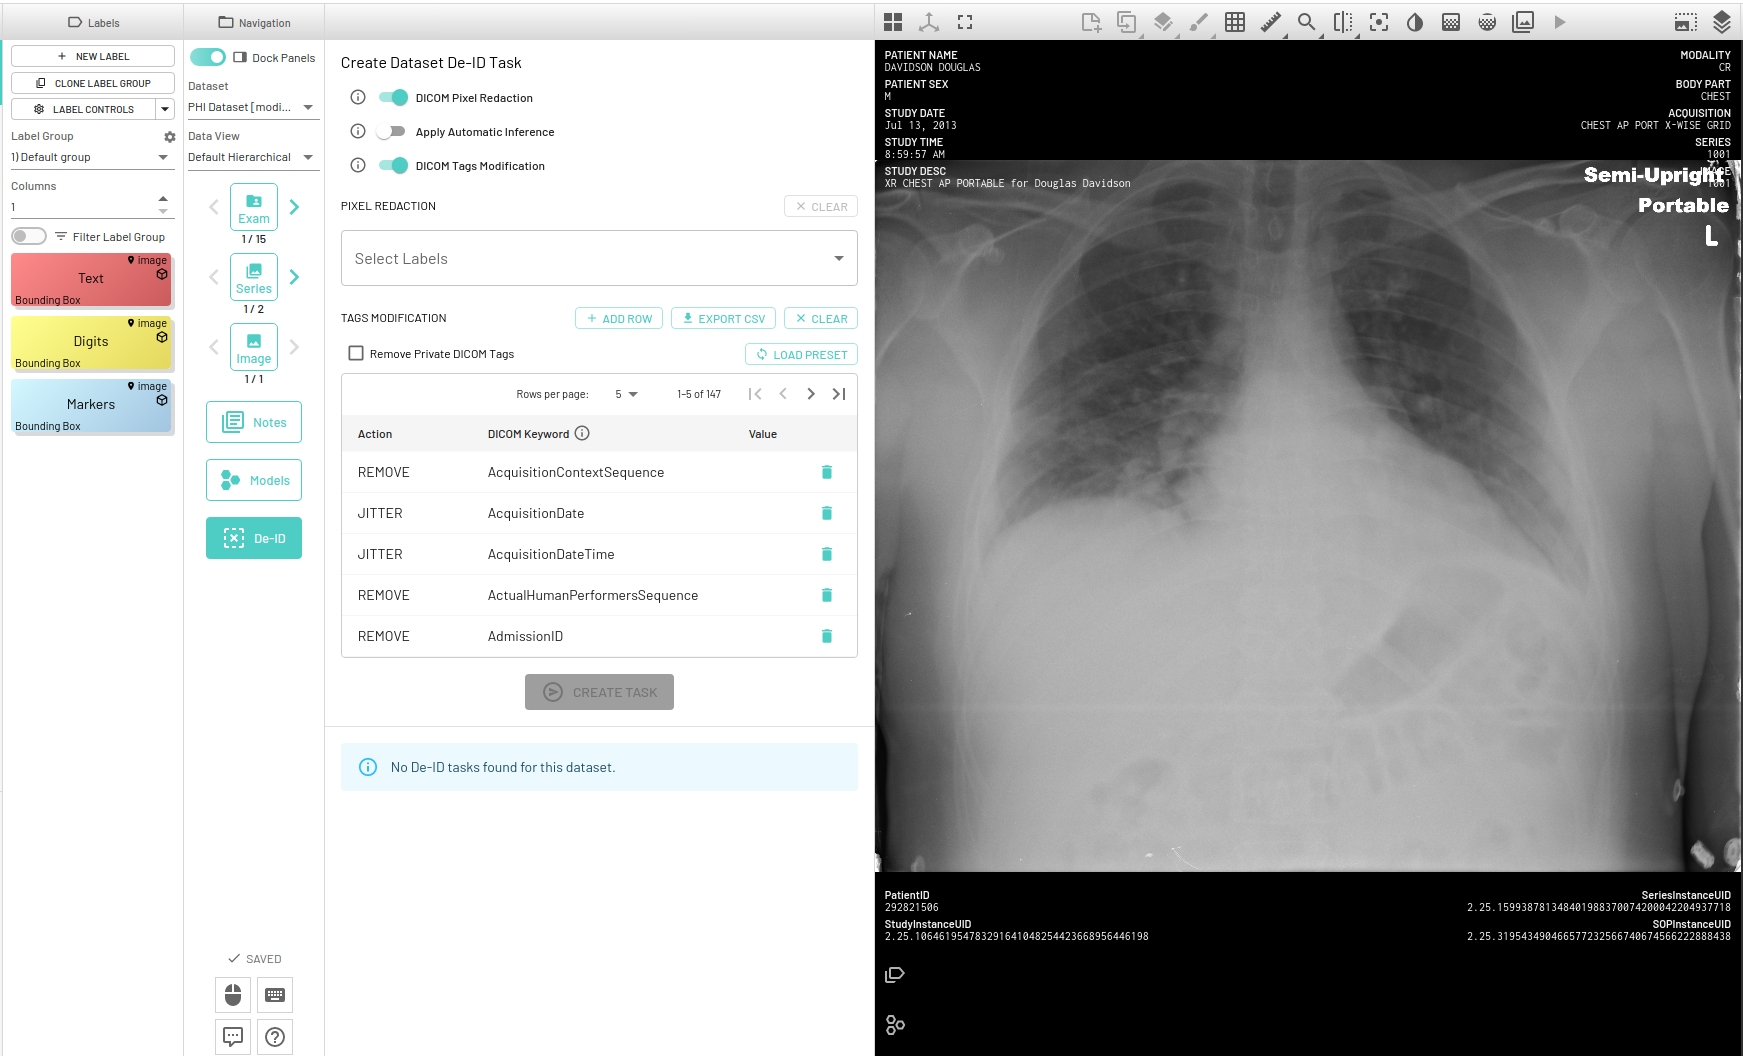
There are toggles next to each kind of task as shown above that will help you run only a specific task or run both tasks together, when you press the Create Task button. By default both DICOM Pixel Redaction and DICOM Tags Modification will be selected.
Note
De-identification works at the dataset level and does not change/replace the original dataset. A new dataset is created for each DEID task.
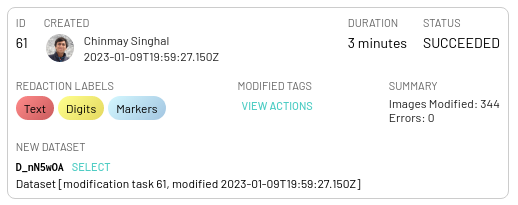
Upon completion, each task will be asssociated with an informative card in the DEID panel that details the duration of the task, modified tags list (whiih can be downloaded) and errors if any.
Redacting burnt-in text from images
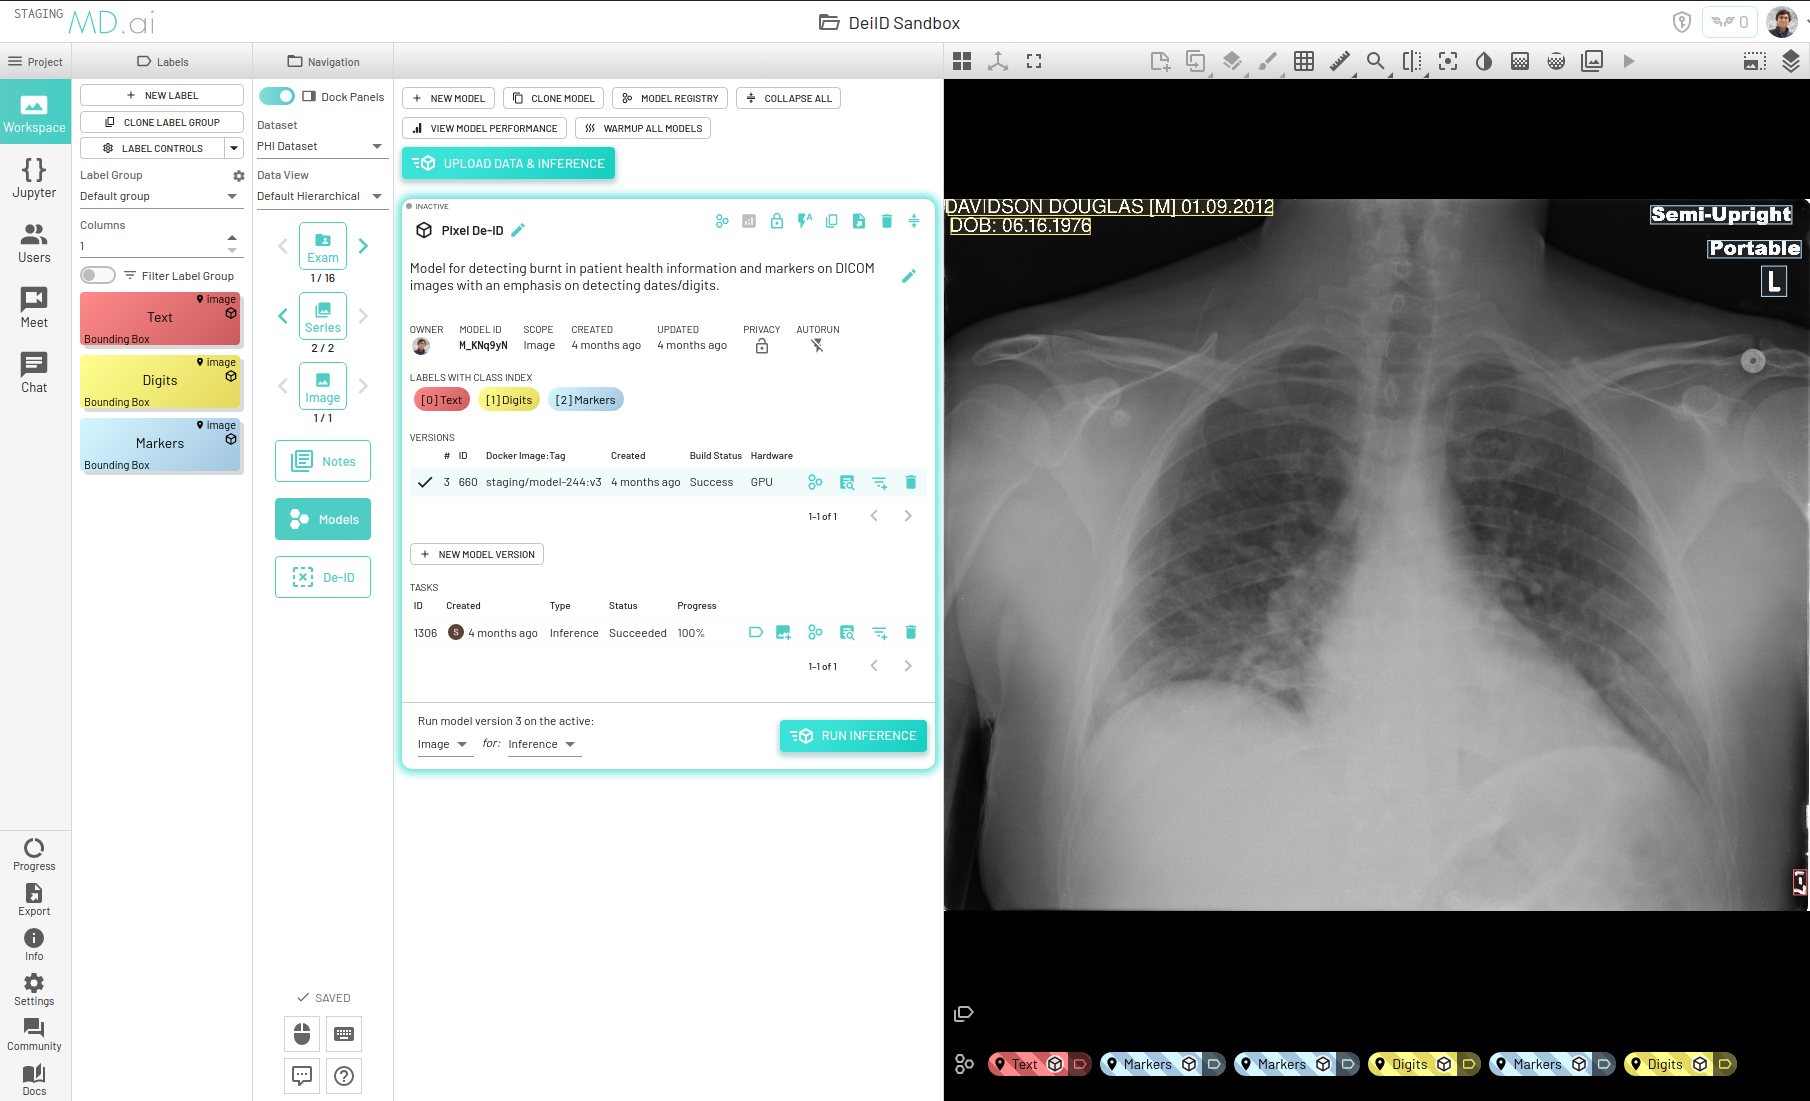
For redacting burnt-in text from DICOM images we have built a proprietary model that takes as input a DICOM image, detects all text present on the image and outputs corresponding bounding boxes, along with classifying detected text into three categories -
- Markers: Radiological markers that may be useful for radiologists while looking at the resource.
- Digits: Detected text that contains any digits/numbers such as age, date, IDs etc.
- Text: Any text that doesn't fall within the markers or digits category such as name, address etc.
Our latest model works best for X-Ray, CT, MR, Ultrasound and Mammography modalities and this model can be found in our Model Registry by the name mdai:pixel-deid for use in your specific project.
DICOM Pixel redaction
You can either use our model to detect and classify text or manually annotate bounding boxes around regions that you wish to redact. If using the model, we have built a human-in-the loop mechanism where users can "approve" outputs by cloning them as annotations and editing or deleting them as required. Only the approved outputs will thus be redacted upon completion of the DEID task.
You can choose to clone each output as annotation individually, or clone all outputs from a model task as annotations in one click.

Once you have the outputs and annotations ready, next step is to actually start the redaction task. Enable DICOM Pixel Redaction from the DEID panel if it's not already enabled. You will then have to select the labels you want to redact. Only the annotations (both approved and created manually) belonging to the selected labels will be redacted. For example, if you only select Digits as the label to be redacted, then all annotations belonging to the Digits label will be redacted. Finally, the Create Task button will start a new redaction task.
Redaction tasks cover the necessary regions with black pixels thereby obfuscating the actual text present on the image. Here is an example -
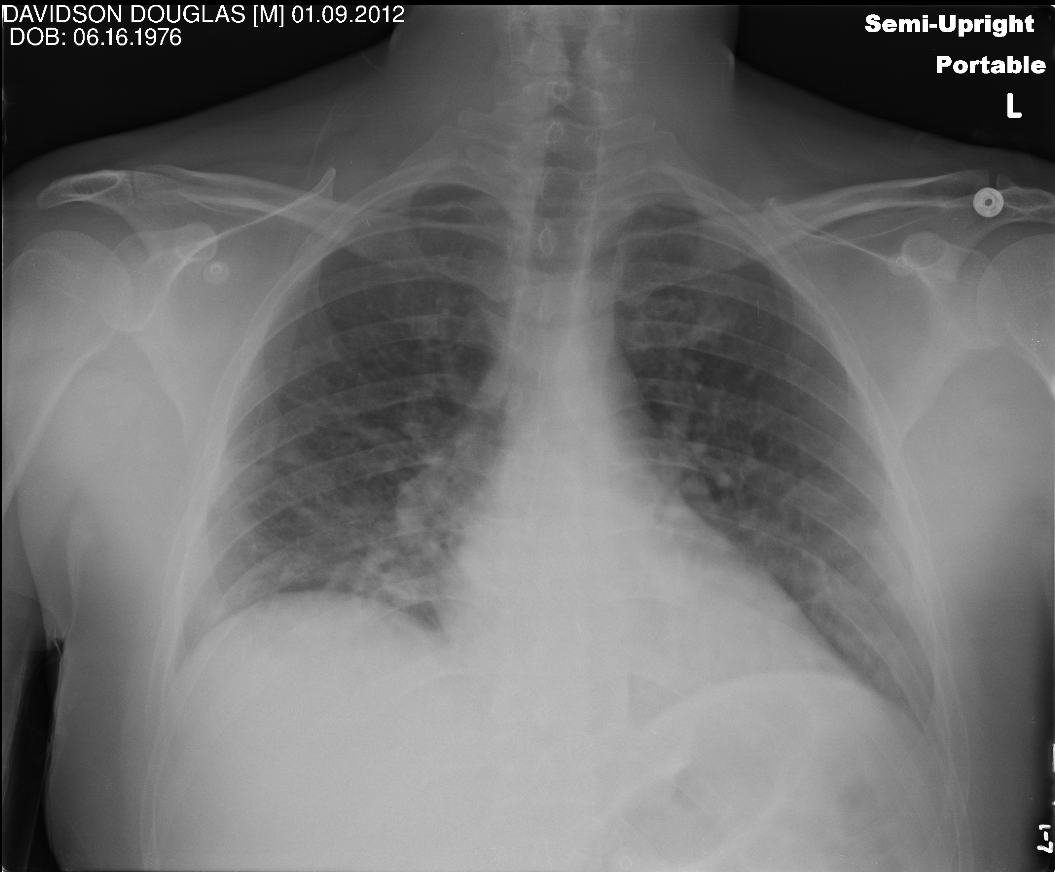
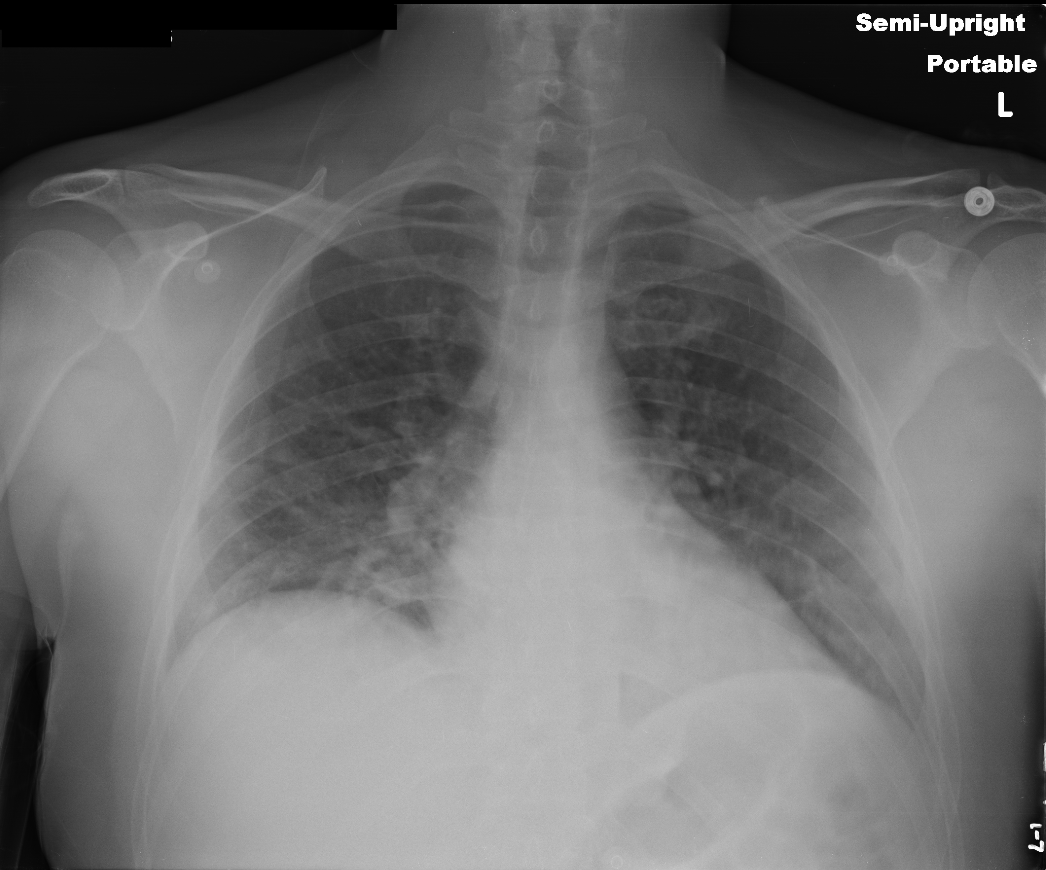
A new dataset will then be created upon successful completion of the task and can be used just like any other dataset in the project. Note that images that do not have any annotations/model outputs for redaction will still be copied exactly as they are to the new dataset without any changes at all.
You can use redaction tasks not just for text de-identifiaction, but they can be extended to other domains as well such as for exctracting just the brain signal from CT/MR scans using a skull-stripping algorithm.
Note
Currently the pixel redaction task only works for Upload and DICOM Push type datasets and for Bounding box, Mask, Freeform and Polygon label types.
Apply Automatic Inference
If enabled, automatic inference (auto-inference) will run the latest mdai:pixel-deid model on the dataset, and automatically redact the detected regions, giving you a clean new dataset to work with.
Note
This setting does not allow any manual intervention, and is recommended for use when you choose to fully agree with the model's outputs and want to redact everything that has been detected.
De-Identifying DICOM tags
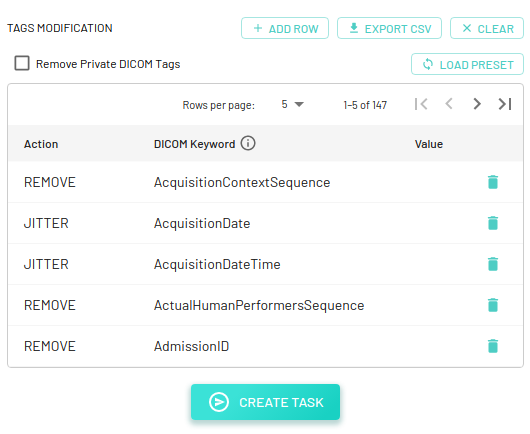
DICOM instance can also be de-identified based on the tags in DICOM metadata. By default, the config consists of a total of 147 tags with a corresponding action to be performed for each tag, but it can be edited as required. This config is based on the Safe Harbor method that falls under the HIPAA Privacy Rule.
We currently provide the following actions for updating DICOM tags -
- ADD: Add a new tag to the reacted DICOM instance.
- REMOVE: Remove a tag completely.
- KEEP: Keep a tag as it is (note: this action does nothing, but may be useful for documentation purposes).
- BLANK: Replace the tag's value with a blank string (note: cannot blank VR types of
USorSS). - REPLACE: Replace the tag's value with an user-defined value. In addition to user-defined values,
func:uuidcan also be used as a value, and a random UUID (UUID4) will be generated (note: for the same values within a DICOM file and across other DICOM files, the same UUID will be reused -- this is helpful to keep values consistent for exam-scoped tags such asPatientIDandPatientName). - JITTER: Offset the tag's value by a random number of days (note: this action only works on tags with VR types of
DAorDT). A random number is selected within the range[-x, x], excluding 0, wherexis the provided positive integer number of days. The default is10days.
You can download the default config file for reference - mdai_deid_tags_config.csv.
Once ready, the Create Task button will start a new redaction task.
Note
In addition to working with these tasks using the UI, you can also choose to use the CLI tool and start/monitor all of the above mentioned tasks.